<?xml version="1.0" encoding="utf-8"?>
<feed xmlns="http://www.w3.org/2005/Atom">
  <title>Matteo Dall&#39;Ombra</title>
  <subtitle>Independent apps and writing about technology, creativity, and everyday life.</subtitle>
  <link href="https://matteodallombra.net/feed.xml" rel="self"/>
  <link href="https://matteodallombra.net/"/>
  <id>https://matteodallombra.net/</id>
  <updated>2026-08-09T13:29:51.000Z</updated>
  
  <entry>
    <title>A new dawn...</title>
    <link href="https://matteodallombra.net/2026/08/09/a-new-dawn/"/>
    <id>https://matteodallombra.net/2026/08/09/a-new-dawn/</id>
    <updated>2026-08-09T13:29:51.000Z</updated>
    <summary>After so many years with Wordpress I was fed up with the slowness and constant issues I was having with my personal blog. Admittedly, it was very much my fault rather than Wordpress fault!</summary>
    <content type="html"><![CDATA[<p>After so many years with Wordpress I was fed up with the slowness and constant issues I was having with my personal blog. Admittedly, it was very much <strong>my</strong> fault rather than Wordpress fault!</p>
<p>As you can clearly see from my posting history, I go through spells of &quot;high volume&quot; posting, followed up by very long spells of silence!</p>
<p>Because of that, it also meant having long spells of not managing/updating/maintaining the blog itself, meaning almost every time I opened it, it would feel slow and also throw a lot of errors at me, including the most frustrating &quot;Error establishing network connection&quot;.</p>
<p>So, I did what I should have done a long time ago: I asked Codex what would have been the best path forward in order to have a fast, simple personal blog. The answer was to move to a static site, since I always ever done just simple posts, no comments, no need for analytics or subscriptions or any of the many wonderful features that Wordpress offers.</p>
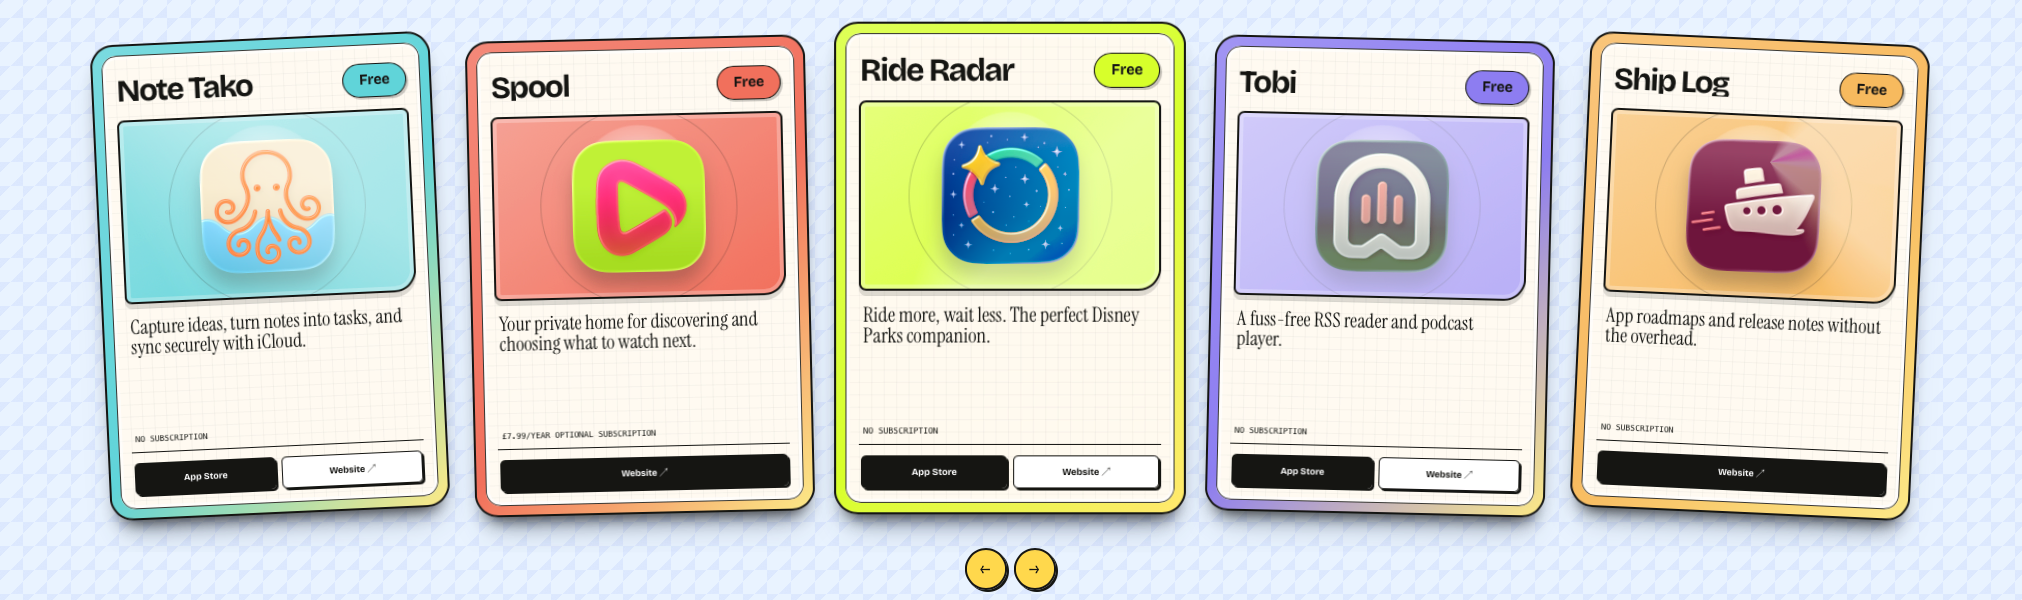
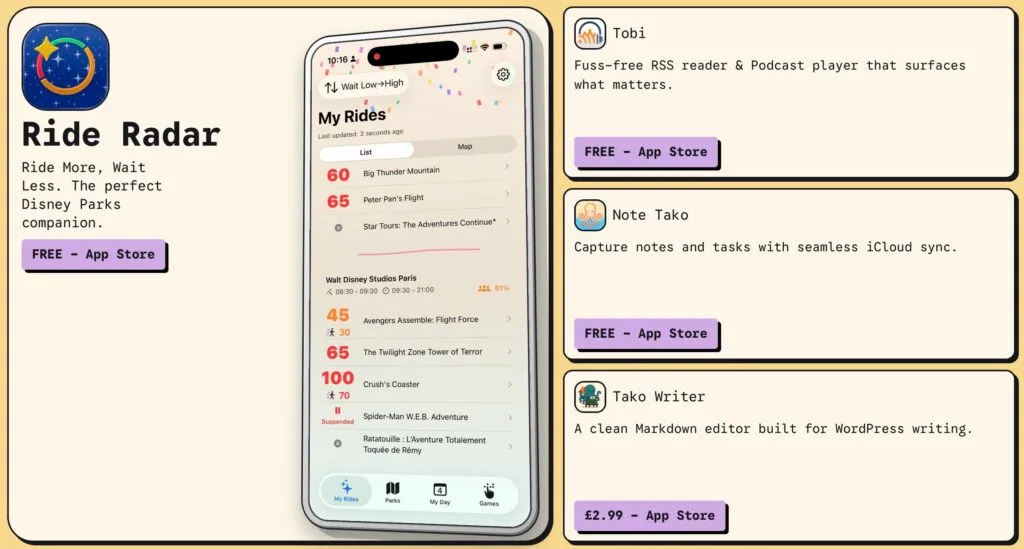
<p>I’ve also used this excuse in order to rebuild the entire site UI, to be a bit more fun and to give a better home to my growing collection of Apps on the AppStore!</p>
<p><img src="/assets/uploads/2026/08/card-apps.webp" alt="Five app cards for Note Tako, Spool, Ride Radar, Tobi and Ship Log" loading="lazy" decoding="async"></p>
<p>I’m so happy with how this turned out as it feels very me, given my start decades ago with Pokemon cards!!</p>
<p>But it also gives me a great appreciation for what I’ve been able to build so far, given that about a year ago today, none of those apps existed…it seems impossible to think of a pre-AI coding pasts and things are just speeding up from here!</p>
<p>Anyway, I was being side-tracked already…the point is, I’m hoping this new foundation will continue to be lean and fast into the future and allow me to continue expressing my creativity without being a blocker!</p>
]]></content>
  </entry>
  
  <entry>
    <title>It’s all about sharing!</title>
    <link href="https://matteodallombra.net/2026/05/11/its-all-about-sharing/"/>
    <id>https://matteodallombra.net/2026/05/11/its-all-about-sharing/</id>
    <updated>2026-05-11T20:50:13.000Z</updated>
    <summary>It’s a new month and therefore there is a new Ride Radar update out! This time I had two main focus: More data Inside each park there is now a new Compass tab. In keeping with the Compass section that I’ve added in each ride, you can now get a quick snapshot of historical and …</summary>
    <content type="html"><![CDATA[<p>It’s a new month and therefore there is a new Ride Radar update out!</p>
<p>This time I had two main focus:</p>
<ol>
<li>more data for parks geeks</li>
<li>fun ways to share future and past trips to Disney parks</li>
</ol>
<p><a href="https://apps.apple.com/gb/app/ride-radar-for-theme-parks/id6756741518">Download for free on the AppStore</a></p>
<h2>More data</h2>
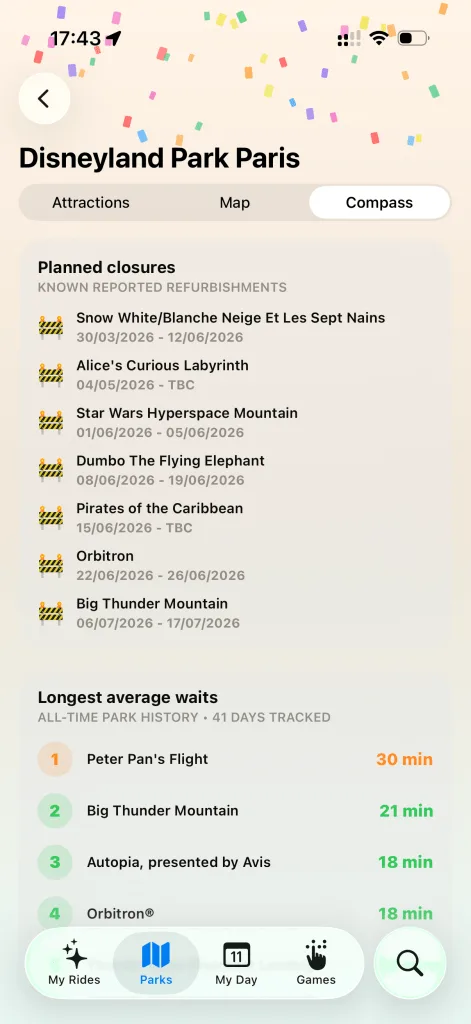
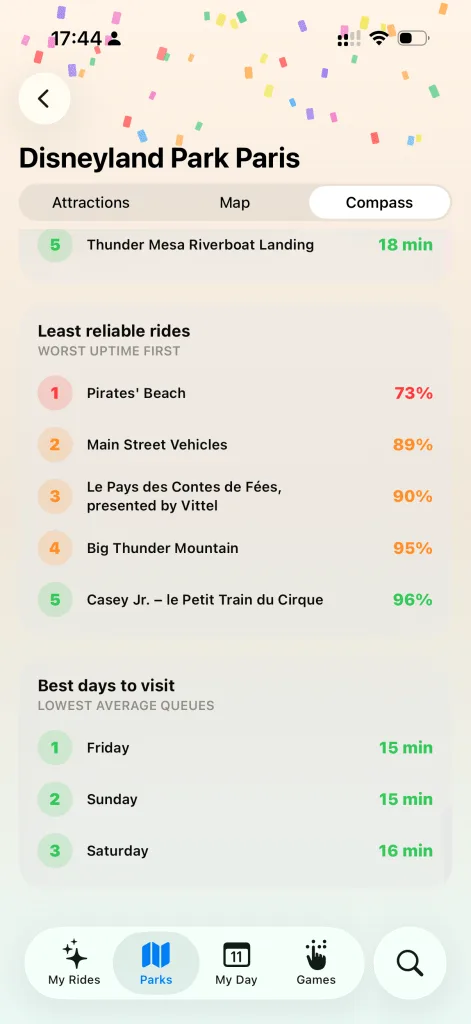
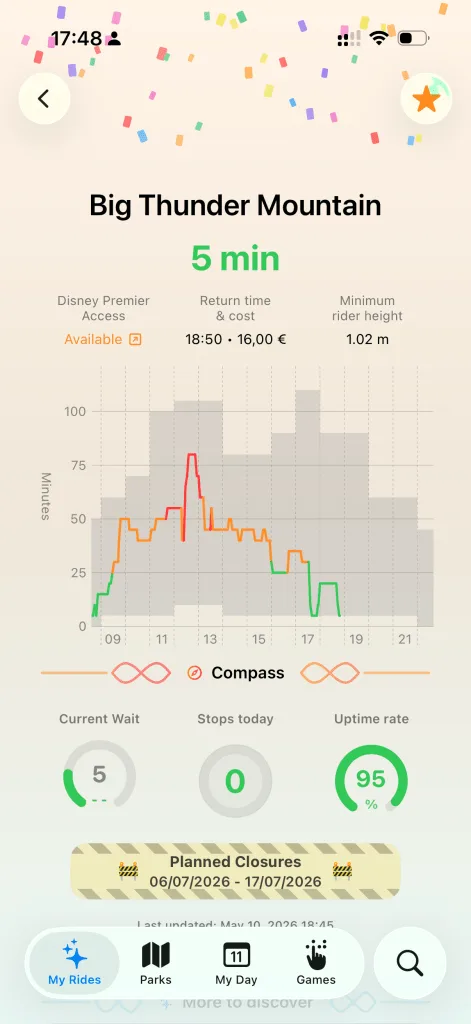
<p>Inside each park there is now a new Compass tab. In keeping with the Compass section that I’ve added in each ride, you can now get a quick snapshot of historical and future data points. Things like:</p>
<ul>
<li>planned closures for rides (these are also displayed on each ride page when applicable)</li>
<li>longest average waits recorded and reliability stats</li>
<li>best day of the week to visit based on major attractions average wait times</li>
</ul>
<p><img src="/assets/uploads/2026/05/IMG_5929.webp" alt="" loading="lazy" decoding="async"></p>
<p><img src="/assets/uploads/2026/05/IMG_5930.webp" alt="" loading="lazy" decoding="async"></p>
<p><img src="/assets/uploads/2026/05/IMG_5931.webp" alt="" loading="lazy" decoding="async"></p>
<p>Hopefully with these new data you can get some extra and fun insights on your favourite parks and rides; maybe even some help when planning your next trip! A couple of disclosures:</p>
<ul>
<li>planned closures are gathered from a few online sources as Disney doesn’t normally make this data available easily outside their apps</li>
<li>longest averages and reliability are both based on my own (growing) data set of observed down time and waits, so it will continue to evolve and will for sure differ from other data you may see on other sites</li>
</ul>
<h2>Sharing is caring!</h2>
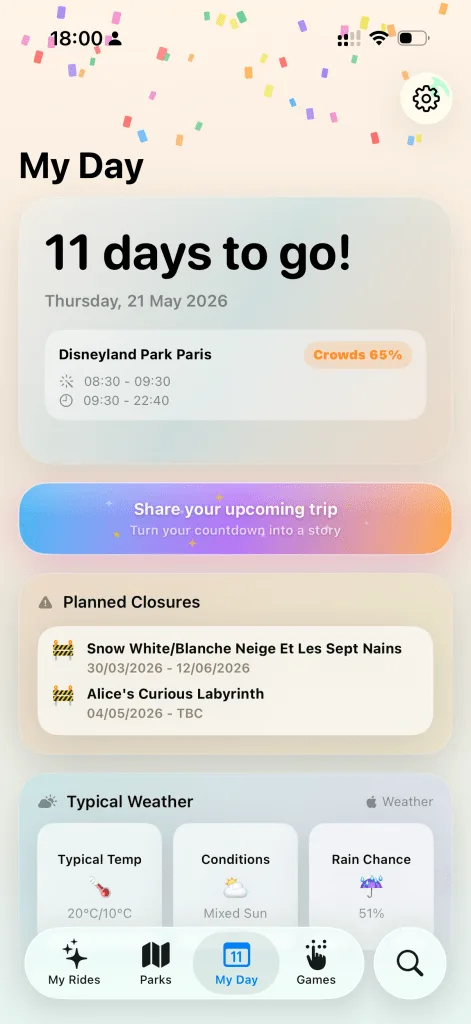
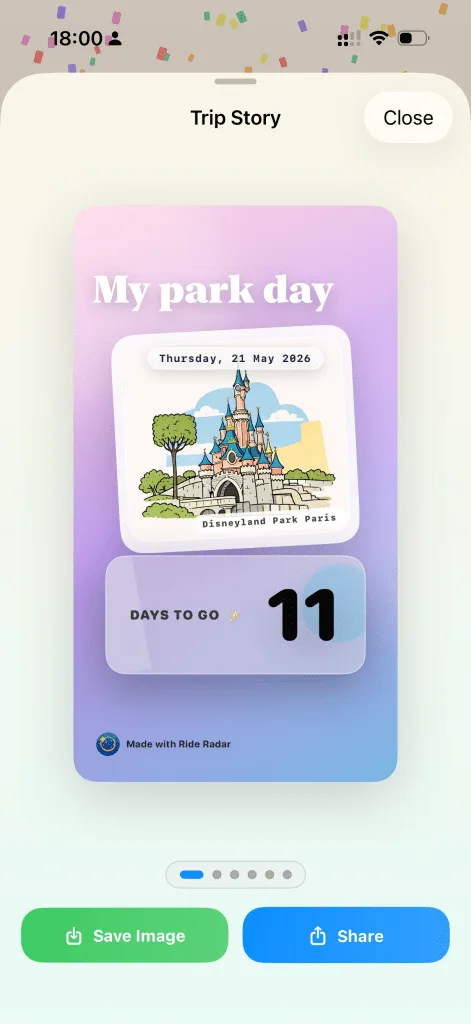
<p>Next on the agenda: sharing! I know how everyone loves to share on various social platforms about their Disney trips – it’s so very fun and I do it all the time. So why not build something inside the app to make this process seamless??</p>
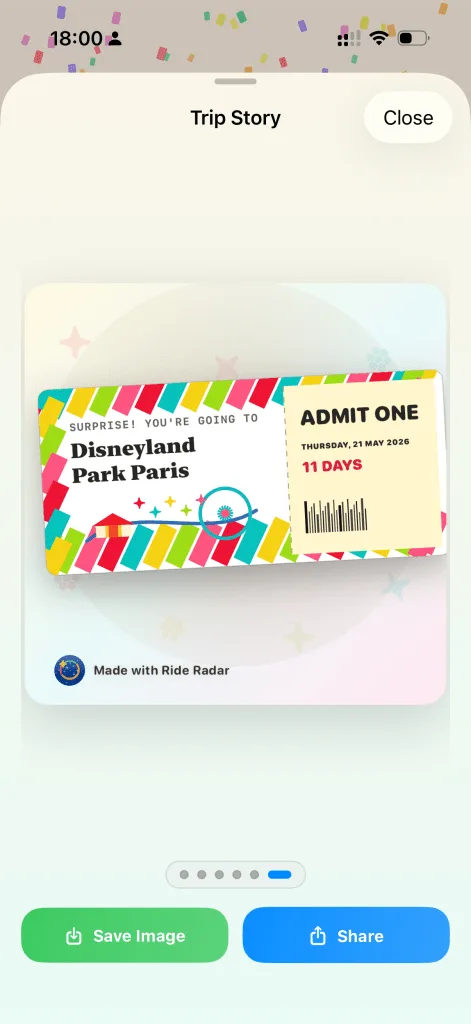
<p>With the new update, once you create an upcoming trip, a new fun and bold button will give you access to a few templates (both portrait and square – optimised for Instagram), making it super easy to make all your friends jealous about your next trip. You can easily share on device or share directly from within the app.</p>
<p><img src="/assets/uploads/2026/05/IMG_5932.webp" alt="" loading="lazy" decoding="async"></p>
<p><img src="/assets/uploads/2026/05/IMG_5933.webp" alt="" loading="lazy" decoding="async"></p>
<p><img src="/assets/uploads/2026/05/IMG_5934.webp" alt="" loading="lazy" decoding="async"></p>
<p>But what about after your trip?? All those fun photos you’ve taken during the day deserve to be seen and shared! Relax, I’ve got a feature for you!</p>
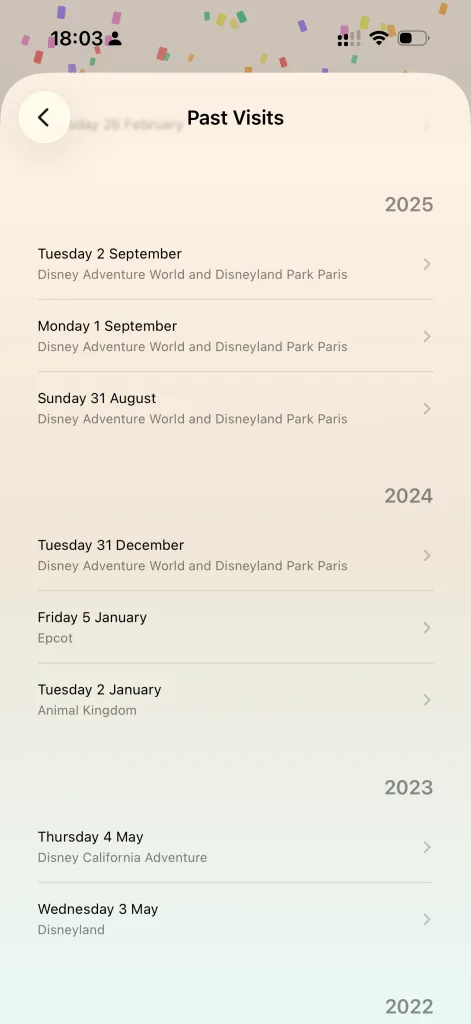
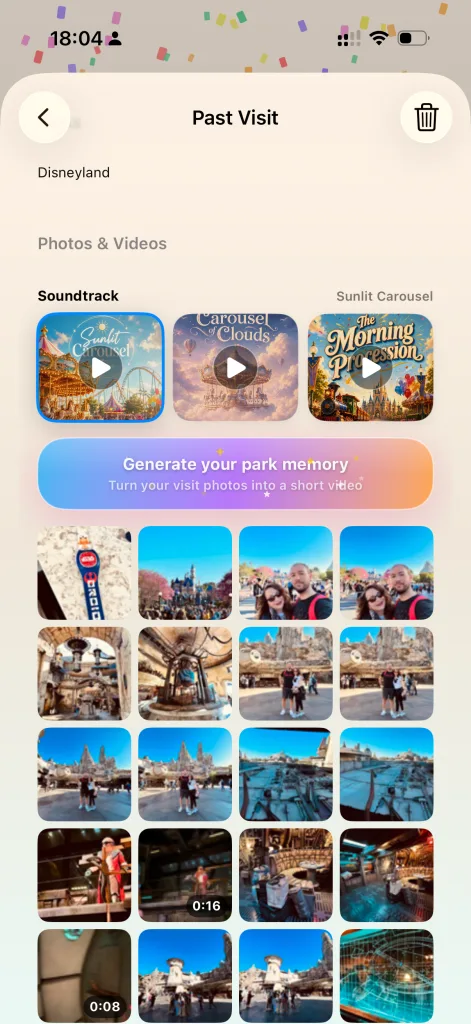
<p>Simply go into the settings, into your past visits and choose the day you want to share – a new popup will ask you to give the app access to the camera roll on your phone (don’t worry this is the standard iOS permission, photos never leave your device) and voila: all the images you took at a park on that day will be shown there (which in itself is an easy way to browse parks specific photos!).</p>
<p>On top of that, a similar bright coloured button will start a quick video generation (a vertical video optimised for Instagram) – you can even pick your soundtrack from 3 available options (more to come soon).</p>
<p><img src="/assets/uploads/2026/05/IMG_5935.webp" alt="" loading="lazy" decoding="async"></p>
<p><img src="/assets/uploads/2026/05/IMG_5936.webp" alt="" loading="lazy" decoding="async"></p>
<p>Make sure to do as the message suggest – keep the tab open while the video is generating otherwise it will pause and you’ll have to start again!</p>
<p>If you want, you can listen to the 3 available songs here:</p>
<p>Sunlit Carousel</p>
<p><audio controls="" src="/assets/uploads/2026/05/Sunlit_Carousel.mp3"></audio></p>
<p>Carousel of Clouds</p>
<p><audio controls="" src="/assets/uploads/2026/05/Carousel_of_Clouds.mp3"></audio></p>
<p>The Morning Procession</p>
<p><audio controls="" src="/assets/uploads/2026/05/The_Morning_Procession.mp3"></audio></p>
<p>BTW all 3 songs were generated with Google Gemini – fairly easy process for simple AI generated short soundtracks, even on the free plan!</p>
<h2>In Summary</h2>
<p>I hope you’ll enjoy this new update – I’m having so much fun developing this little app, and believe me, the roadmap is still full of new and wonderful surprises!</p>
<p><a href="https://apps.apple.com/gb/app/ride-radar-for-theme-parks/id6756741518">Download for free on the AppStore</a></p>
]]></content>
  </entry>
  
  <entry>
    <title>They really don’t have to!</title>
    <link href="https://matteodallombra.net/2026/04/06/they-really-dont-have-to/"/>
    <id>https://matteodallombra.net/2026/04/06/they-really-dont-have-to/</id>
    <updated>2026-04-06T18:39:25.000Z</updated>
    <summary>Just a quick post as a reaction to some of the discourse online around iPhones having been sent to space on Artemis II. Post like this one (this is just the latest I’ve seen no other reasons) are constantly saying that Apple must be crazy if they are not going to do an ad campaign …</summary>
    <content type="html"><![CDATA[<p>Just a quick post as a reaction to some of the discourse online around iPhones having been sent to space on Artemis II.</p>
<p>Post like <a href="https://mastodon.social/@BasicAppleGuy/116358917728706467">this one</a> (this is just the latest I’ve seen no other reasons) are constantly saying that Apple must be crazy if they are not going to do an ad campaign about this. Or what a missed opportunity to run a campaign..</p>
<p>But the funny thing is: they absolutely don’t have to.</p>
<p>Literally every news outlet, blogs, pundits is piling up on this.</p>
<p>I missed the original news and even then I know now that NASA has sent iPhones in space and we are seeing the amazing results.</p>
<p>This is the power of such a big B2C brand: transcending from just being a brand to be in the common discourse without even having to try!</p>
<p>This was and is the best Apple ad campaign they didn’t have to spend a single dime on. Just make your product so good that it will be its own ad!</p>
<p>Now I can’t wait to see even more images from the mission!!</p>
]]></content>
  </entry>
  
  <entry>
    <title>The best escape from reality</title>
    <link href="https://matteodallombra.net/2026/04/02/the-best-escape-from-reality/"/>
    <id>https://matteodallombra.net/2026/04/02/the-best-escape-from-reality/</id>
    <updated>2026-04-02T15:43:55.000Z</updated>
    <summary>Keeping your mind busy on the right thing at the right time is a dark art. It’s so easy to get dragged into a spiral and have it become the only thing you can think of, any time of any day. Trying to break that routine requires diligence, patience and most importantly a plan to …</summary>
    <content type="html"><![CDATA[<p>Keeping your mind busy on the right thing at the right time is a dark art. It’s so easy to get dragged into a spiral and have it become the only thing you can think of, any time of any day.</p>
<p>Trying to break that routine requires diligence, patience and most importantly a plan to realise the escape.</p>
<p>I’m not sure if you, the reader, will see this one coming, but vibe-coding has been my perfect escape plan!</p>
<p>I’ve written before about vibe-coding, both here and on <a href="https://mastodon.social/@matteodallombra">Mastodon</a>, sometimes sporadically, but I’ve now reached a point where I wanted to consolidate few additional thoughts together.</p>
<p>What did it was reaching the milestone of having 4(!!!!!) apps live on the AppStore, from 0 only four months ago. The number of apps in itself is not the point.</p>
<p><img src="/assets/uploads/2026/04/IMG_0676-1024x549.webp" alt="Screenshot -- Screenshot" loading="lazy" decoding="async"></p>
<p>The point is this level of creativity that I’ve never felt before!</p>
<p>Actually, I need to correct myself. I’ve always had creative ideas and thoughts, but I was lacking the time to learn and get the tools required to turn some of those ideas into actual things. Since getting my first iPhone, I’ve always had desires to create apps and I did try in the past; mostly wrapping web technology into a glorified app; nothing I was ever proud enough to show.</p>
<p>With a full time job, I continued to consider the possibility of creating apps as a dream – enter AI.</p>
<p><img src="/assets/uploads/2026/04/IMG_0675-1024x284.webp" alt="Screenshot -- Screenshot" loading="lazy" decoding="async"></p>
<p>I’ve been a paid subscriber to ChatGPT for quite a while now and over the last few months AI has grown and grown in daily usage for all sorts of things. Daily as a Google replacement, but also as THE tool that unlock the door to unlimited possibilities.</p>
<p>I’ve been very public about my usage of AI and even at work it’s something that I often talk about and to those who ask, my standard reply to question of “how/why/what do you use AI for” has become simple: <em>if you can imagine, you can build it</em>.</p>
<p>And when I say you can build it, it’s not just software, but it’s hardware too. You may have seen my Project Tako series in the past, a remote controller for Home Assistant that combines software and hardware – none of it would have happened without AI.</p>
<p>Still, for all the successes and advancements, that still wasn’t the perfect escape. It still felt like “work”, but the direction was set. And it was set in a very specific direction.</p>
<p>Ever heard about the Happiest Place on Earth? For the un-initiated, I’m referring to Disneyland, and to be even more specific, for me it means Disneyland Paris.</p>
<p><img src="/assets/uploads/2026/04/IMG_5535-1.webp" alt="" loading="lazy" decoding="async"></p>
<p>That’s when I had the lightbulb moment! You see, I don’t just like<br>
Disneyland Paris, I pride myself in identifying as a Disney Adult and obsessed on all the small details, the Easter eggs, the ride history and backgrounds, the change to the park…and I could go on…</p>
<p>Disney Parks are the ultimate escape from reality. Once you step in, all the weight immediately lifts from your shoulders and the escape and detachment from the world is real, and beautiful. Of course, the Disney blues are also very real, when you find yourself dealing with leaving that magic behind and turning reality back on!!</p>
<p>But what if there was a way to keep your brain tuned to those feelings and emotions even when you are miles away from those Parks?</p>
<p>That was the prompt for <a href="https://apps.apple.com/app/id6756741518">Ride Radar</a>.</p>
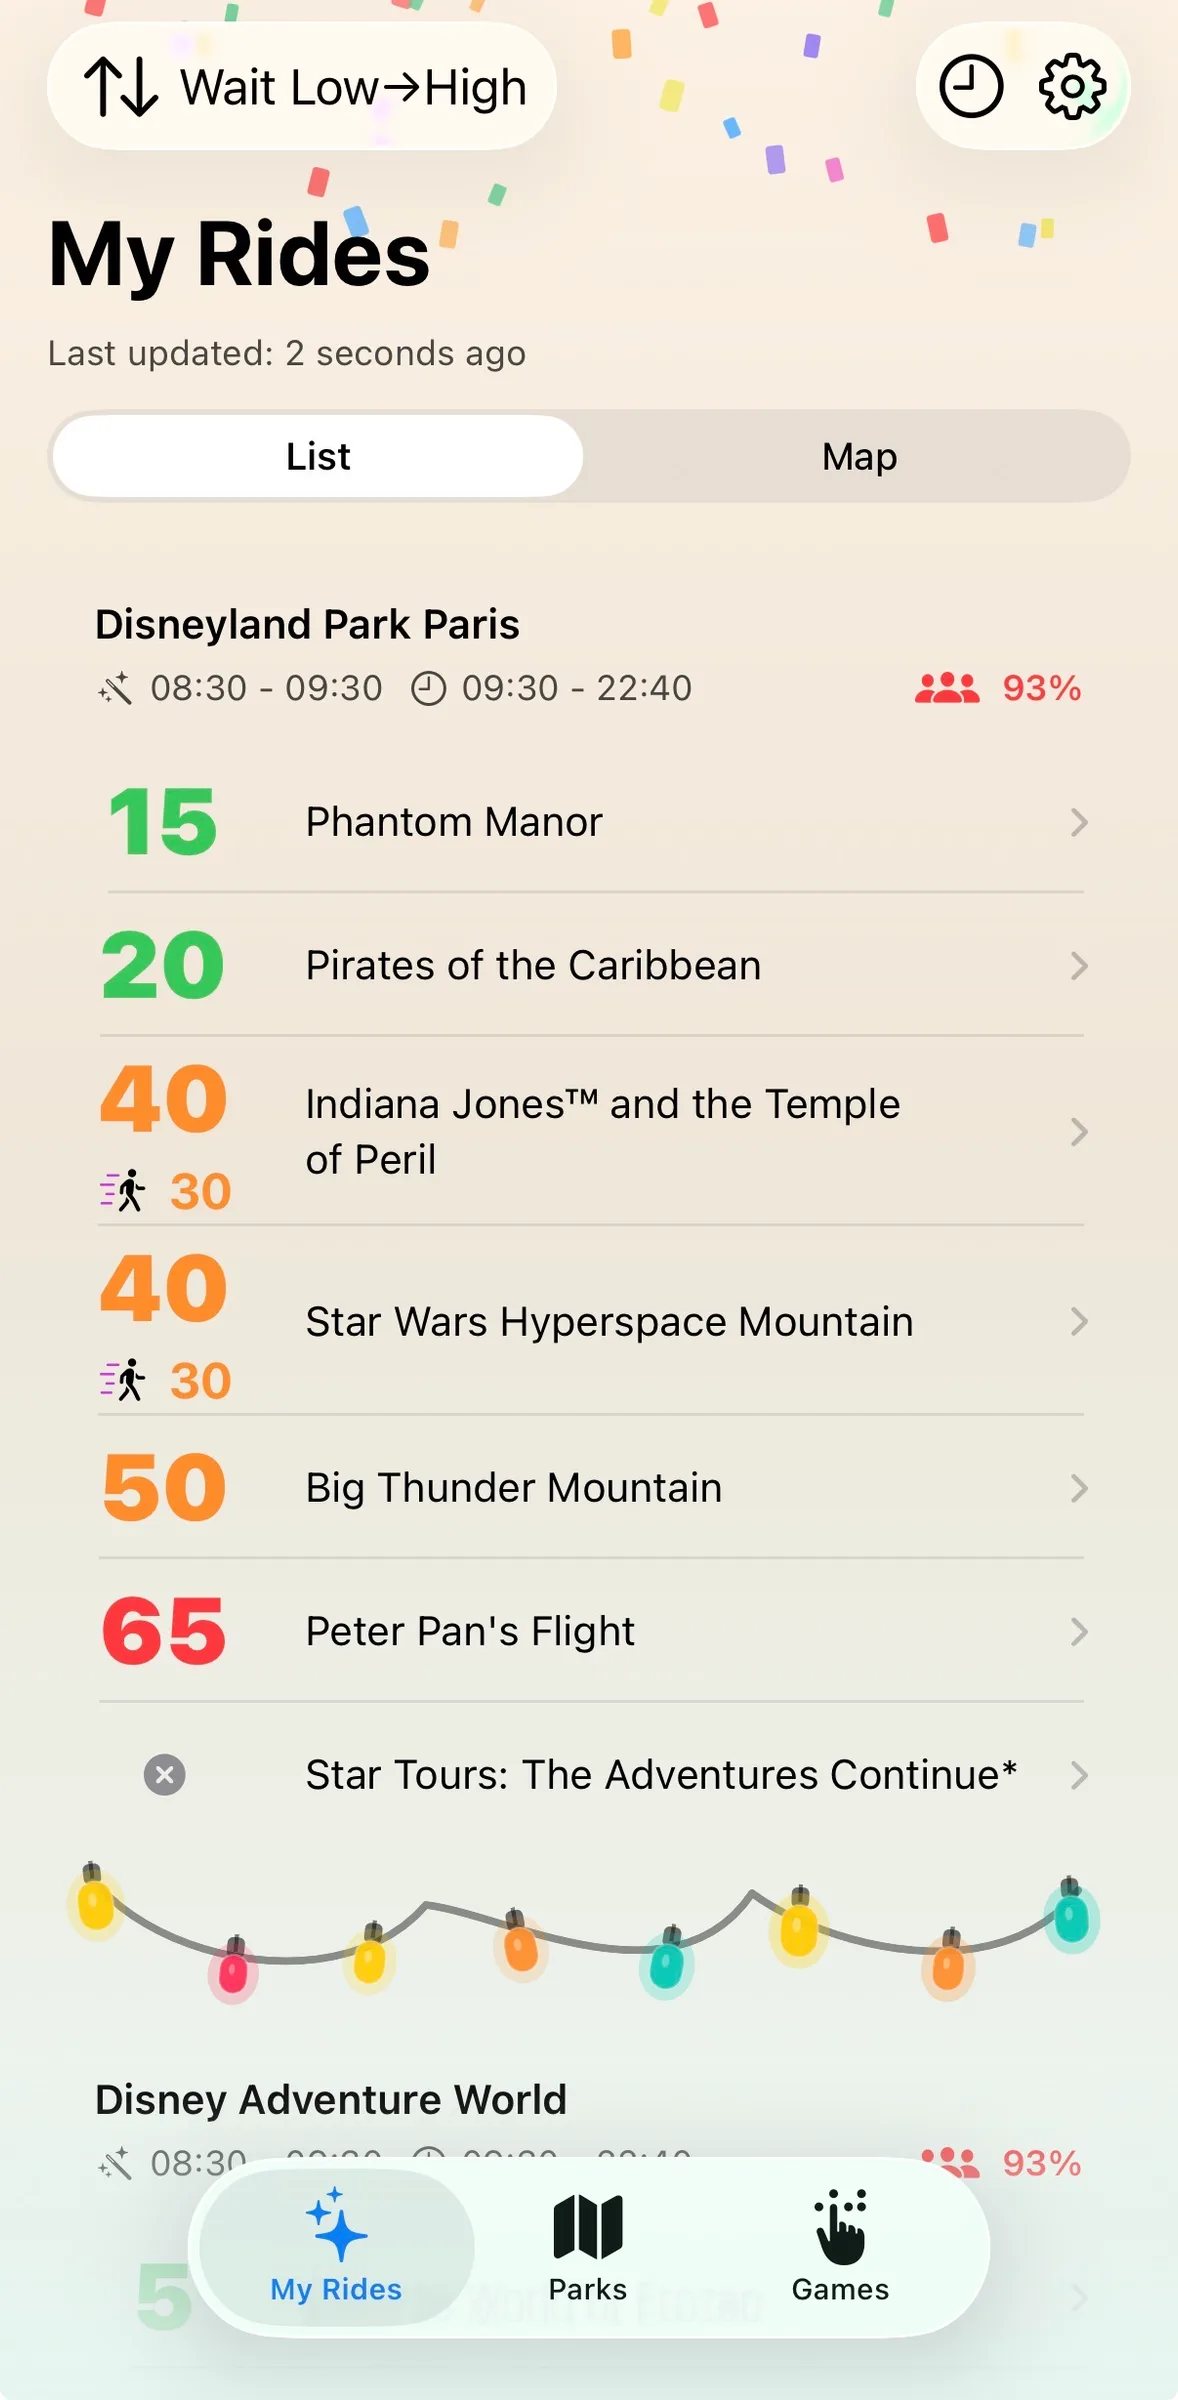
<p><img src="/assets/uploads/2026/04/inline.webp" alt="inline" loading="lazy" decoding="async"></p>
<p>At its core, <a href="https://apps.apple.com/app/id6756741518">Ride Radar</a> allows you see and keep track of live queue times for every ride in any Disney Park worldwide.</p>
<p>But it’s also so much more!</p>
<p>It’s my way to let my brain escape from reality and be “forced” to think about nothing but those parks, finding info and reading about them, to be updated on all the latest developments so they can be integrated into my app. And in doing so,I find myself opening the app multiple times a day just to see what’s going on somewhere around the world: are queues higher or lower than average? Have new rides moved queues and crowds behaviour? What’s happening on a random Wednesday that has queues suddenly skyrocketing? Oh wow, Guardians of the Galaxy Rewind is down again?!</p>
<p>Learning how to shape and apply Codex to the development of iOS apps took a while for sure, but no where near how long it would have taken me to actually learn Swift development from scratch and not just Swift. Ride Radar has server side components, live activities, a growing database of historic wait times to eventually learn from and become aware of and intelligent about. It’s a small ecosystem and microcosm of joy that just keeps growing!</p>
<p>I’ve also met and shared ideas with a bunch of fun people online,some going on a similar journey as me, others already established in the world of development. Overall, I’ve been learning and growing and now that the genie has left the bottle,there’s no way back inside!</p>
<p>If you’ve read so far and you happen to have an iPhone, <a href="https://apps.apple.com/app/id6756741518">why don’t you join me on this greatest escape</a>? It’s free 😉</p>
]]></content>
  </entry>
  
  <entry>
    <title>16 Years?</title>
    <link href="https://matteodallombra.net/2026/02/18/16-years/"/>
    <id>https://matteodallombra.net/2026/02/18/16-years/</id>
    <updated>2026-02-18T10:52:55.000Z</updated>
    <summary>This is absolutely nuts… We all spend a lot of time on the internet nowadays, but it’s also crazy to think about how quickly this has evolved over the last few years. Where we are now compared to even only a couple of years ago, it seems like millennia have gone by! So when I …</summary>
    <content type="html"><![CDATA[<p>This is absolutely nuts…</p>
<p>We all spend a lot of time on the internet nowadays, but it’s also crazy to think about how quickly this has evolved over the last few years. Where we are now compared to even only a couple of years ago, it seems like millennia have gone by!</p>
<p>So when I got the email above, it made do a double take!</p>
<p>I’ve always been an early adopter of tech and the internet was no different. From running a phone cable across my parents’ place, to yell at my mum when she would pick up the phone and my connection would drop all of a sudden, to have AI doing all my most boring chores and tasks! What a ride!</p>
<p>The constant element in all of this journey has always been this site! Registering my own domain, having a personal outlet for any sort of ideas and experiment has always been such a fun thing to have and do. Doesn’t matter that I’ve been shouting into a void since day one, still fun to do for me!</p>
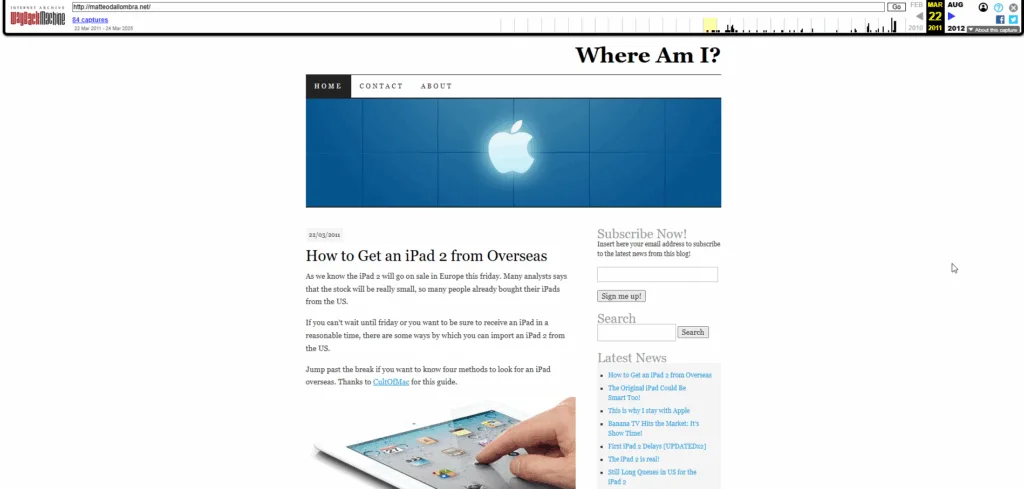
<p>The site itself has been through so many iterations and changes and ideas…the WordPress anniversary email also prompt me hopping on the way back machine and take a trip down memory lane, what a crazy start!</p>
<p><img src="/assets/uploads/2025/08/wayback-machine-1024x489.webp" alt="wayback machine" loading="lazy" decoding="async"></p>
<p>To the next 16 years and beyond!</p>
]]></content>
  </entry>
  
  <entry>
    <title>Vibe Coding Follow-up</title>
    <link href="https://matteodallombra.net/2025/09/05/vibe-coding-follow-up/"/>
    <id>https://matteodallombra.net/2025/09/05/vibe-coding-follow-up/</id>
    <updated>2025-09-05T07:41:02.000Z</updated>
    <summary>I was inspired in writing this post after seeing this article from Stephen Robles being reposted on Mastodon. It is a very interesting read, and certainly resonated with me in some areas, but also I was surprised by the final result. The TLDR is that AI wasn’t good enough to take an idea and make …</summary>
    <content type="html"><![CDATA[<p>I was inspired in writing this post after seeing <a href="https://beard.fm/blog/ai-failed-my-podcast-app">this article from Stephen Robles being reposted on Mastodon</a>. It is a very interesting read, and certainly resonated with me in some areas, but also I was surprised by the final result.</p>
<p>The TLDR is that AI wasn’t good enough to take an idea and make it into an app, all the while having zero coding experience.</p>
<p>I’m currently writing from my <a href="https://apps.apple.com/gb/app/tako-writer/id6749770199">Tako Writer</a> app, after having made a note for the post idea on my <a href="https://apps.apple.com/app/id6749778343">Note Tako</a> app! I guess what I’m trying to say is that AI may be good enough to get you there, but the biggest takeaway should be that a lot of time needs to go into learning the AI tools first, before you can think about start building something with it.</p>
<p>I still get the impression that AI is seen as a magic wand, just wave it in the air and something great will appear out of thin air. In my experience AI is still more of a Range Rover engine that breaks down periodically and I’m the car owner always carrying a set of spanners and grease to keep it running when it breaks.</p>
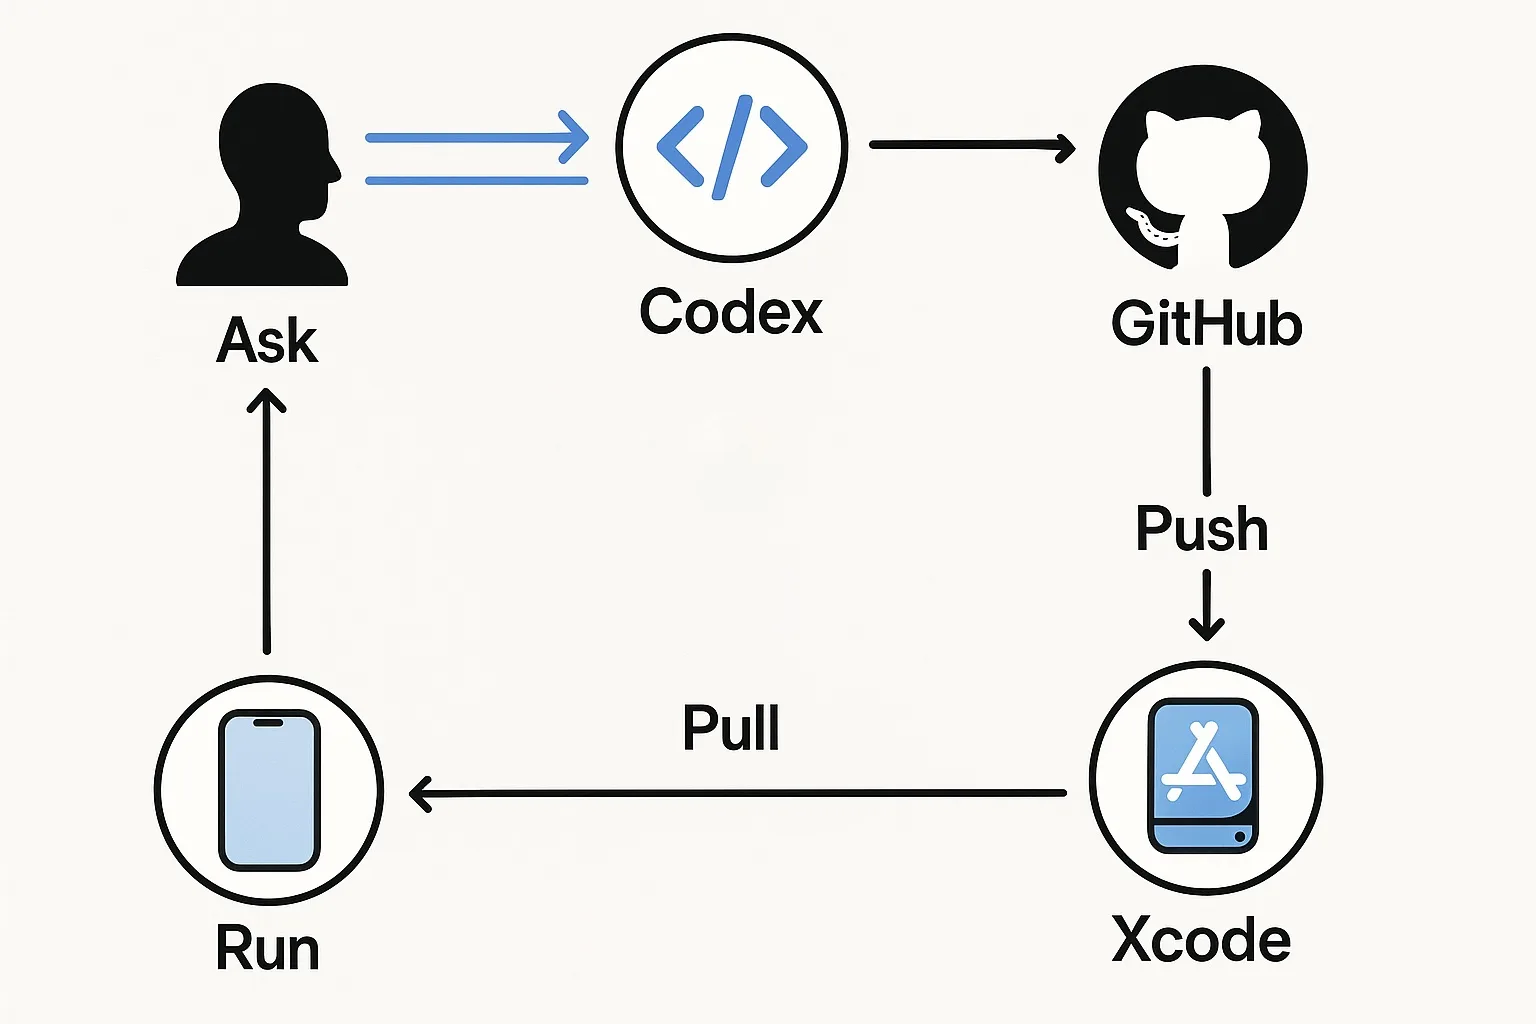
<p>I wanted to take this opportunity to fully layout my “development cycle” with AI, in case it could help others. Another takeaway from Rob’s post was that he started using the ChatGPT Mac app and a lot of frustrations were with the app getting confused which files to edit and which files were active in Xcode and so on.</p>
<p>I take a different approach as outlined below.</p>
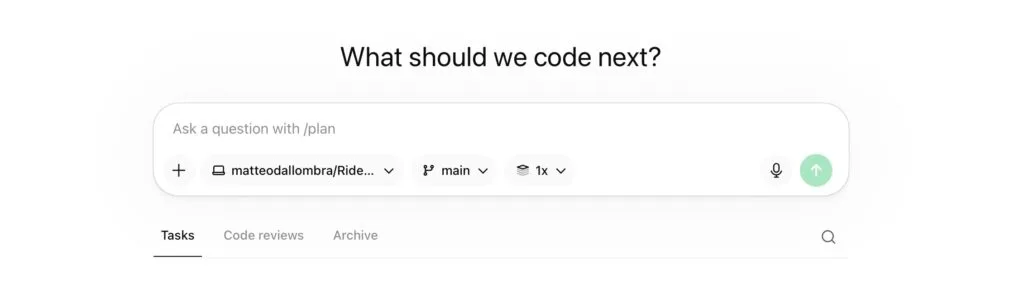
<p><img src="/assets/uploads/2025/09/inline.webp" alt="inline" loading="lazy" decoding="async"></p>
<p>The advantage of this approach is that Codex is in full control of the GitHub repo, can navigate, create, edit, delete files as needed, without me having to know which file and where I need to make the changes. Sometimes you need to fix manually some conflicts, but even those are clearly labelled and super easy to manage.</p>
<p>With this cycle, there is a continuous feedback loop in which every iteration can easily build on the previous step. On top of this, the advantage and the true power of this is the ability of Codex to work on multiple concurrent tasks.</p>
<p>And this is truly the power and, in my opinion, the better way to approach AI development. When I started, I used to write long all-encompassing prompts, asking for a lot of changes all over the app. I quickly realise this was a mistake as often Codex would straight up ignore parts of the prompt! Instead, I started writing multiple <em>bite-size</em> prompts and letting the system work in parallel, achieving much better results.</p>
<p>It’s still not a perfect system, but I also had never touched Xcode and Swift before starting this journey a few months back, but after a lot of trial and error I got there. Yes I won’t be winning any awards with these apps, but I use them daily and I’m so happy with them!</p>
<p>So I guess my TLDR (I know this should go at the top): never give up and learn how to proactively swear at your AI of choice while you try to keep it on a straight line!</p>
]]></content>
  </entry>
  
  <entry>
    <title>Introducing Tako Writer – Your next WordPress Markdown editor!</title>
    <link href="https://matteodallombra.net/2025/08/26/introducing-tako-writer-your-next-wordpress-markdown-editor/"/>
    <id>https://matteodallombra.net/2025/08/26/introducing-tako-writer-your-next-wordpress-markdown-editor/</id>
    <updated>2025-08-26T17:32:23.000Z</updated>
    <summary>Here we go again! I know I’ve recently teased this project, but it’s finally live. The Tako family is expanding and today I’m excited to officially introducing Tako Writer – a lightweight Markdown editor for quick and easy WordPress posting. As I’ve outlined in my previous post, I do sometimes suffer from procrastination, especially when …</summary>
    <content type="html"><![CDATA[<p>Here we go again! I know I’ve recently teased this project, but it’s finally live. The Tako family is expanding and today I’m excited to officially introducing <a href="https://apps.apple.com/gb/app/tako-writer/id6749770199">Tako Writer</a> – a lightweight Markdown editor for quick and easy WordPress posting.</p>
<p>As I’ve outlined in my previous post, I do sometimes suffer from procrastination, especially when it comes to writing online.</p>
<p>Over the years, my personal blog went through many iterations, but one thing fundamentally always stayed the same and that was the writing flow: log online, create and edit the post directly into the online WordPress editor and hit post.</p>
<p>You may say, what’s the issue there? At its core, it’s a very refined process, but also WordPress keeps evolving and changing and I’ve found the writing experience to be getting more and more cluttered with distracting features. My writing needs have always been fairly simple: give me a Markdown editor and I’ll be king! Yes of course there are plugins to turn the online editor to a simpler Markdown machine (<a href="https://en-gb.wordpress.org/plugins/markup-markdown/">and I would recommend using this one with Tako Writer</a>), but still the friction of having to go online can be a pain.</p>
<p>I find that inspiration strikes when you least expect it and therefore having an option to quickly capture ideas at any time was a very strong motivator for this app. As I type this, I’m on a train to London, with a very spotty connection – I had it already in the past where I ended up losing work and progress because it didn’t properly sync and I closed the browser session.</p>
<p>So, having said all of this, let me properly introduce Tako Writer to you!</p>
<p>As I mentioned already, the core function of this app is to be a simple, offline, drafting Markdown editor for your WordPress blog.</p>
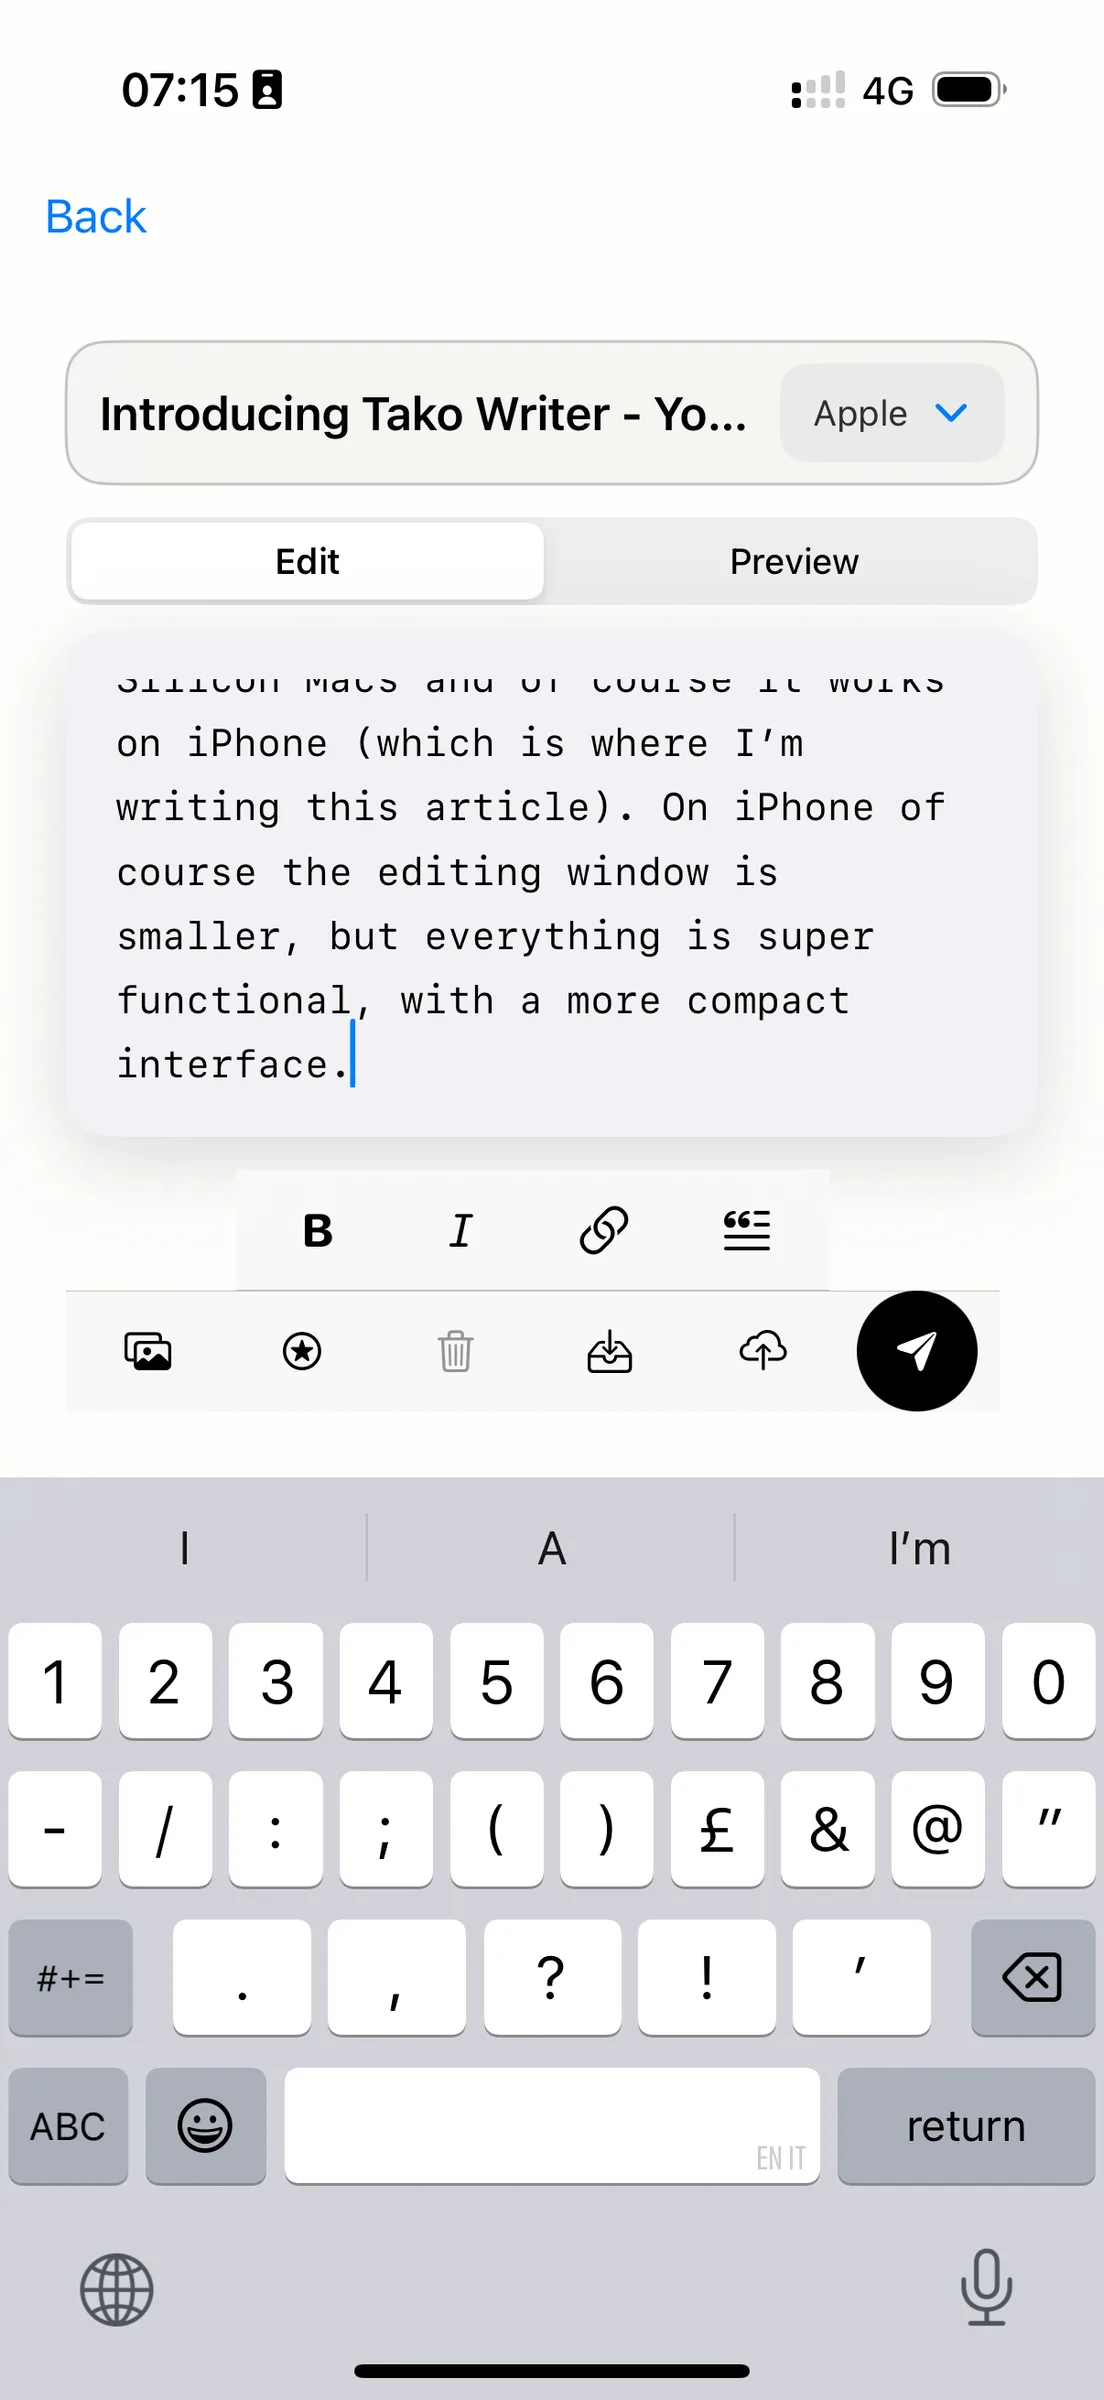
<p>It is specially designed for iPad (which is where I do most of my writing), but it works well on Apple Silicon Macs and of course it works on iPhone (which is where I’m writing this article). On iPhone of course the editing window is smaller, but everything is super functional, with a more compact interface.</p>
<p><img src="/assets/uploads/2025/08/inline-16.webp" alt="inline" loading="lazy" decoding="async"></p>
<p>When editing text, you can directly type in Markdown syntax for things like <em>italic</em>, <strong>bold</strong>, text quote or URL – or if you are not familiar with some of that you can select text and then apply the style with the toolbar.</p>
<p>You can of course upload images directly into your WordPress library and they will be automatically inserted with the correct syntax in the body of the post.</p>
<p>You can pick or add a new category to your post, syncing the info directly with your WordPress setup.</p>
<p>Now let’s talk workflow.</p>
<p>First of all, to make this app work you need to install and configure <a href="https://en-gb.wordpress.org/plugins/jwt-authentication-for-wp-rest-api/">JWT Authorisation</a>. It is super self explanatory and only requires a one line to be added to your WordPress <em>config.php</em> file and you are good to go.</p>
<p>Once you are logged in, you’ll find 3 tabs: Local, Online, Published.</p>
<p><img src="/assets/uploads/2025/08/inline-19.webp" alt="inline" loading="lazy" decoding="async"></p>
<p><strong><em>Local</em></strong> is your starting point. Here you can start a new post and write to your heart content while being offline. Progress is auto saved every few seconds and you can always trigger a manual save. The preview is a basic preview for the Markdown and images.</p>
<p><strong><em>Online</em></strong> is the next step in the flow. If you are not ready to go straight from offline ideas to fully published post (which you can totally do), you can push your post to WordPress as a draft. This step in my mind serves two purposes: first it can be seen as a sort of backup. Offline drafts are only saved local to your device. Logging out or deleting the app will remove offline drafts. The second function is to preview the post in your WordPress theme. On an Online draft, when hitting the preview, you will be presented with the native WordPress preview function, so you can double check that everything looks as you’d expect.</p>
<p><strong><em>Published</em></strong> should be fairly straightforward to get. This section will list the last 20 published posts from your blog. I see this as a way to quickly check and adjust the last few posts on the go, it’s not really meant to be a full archival or history option.</p>
<p>And that’s it, that’s Tako Writer in a nutshell.</p>
<p>The final thing to mention is the price: £2.99 – I wanted to also use this app as a further experiment in my new journey on the AppStore. My first app is free as it’s super niche. This one I think it could have a bit more wider potential and I wanted to see how pricing would come into the picture. Given there aren’t recurring costs associated with this, a subscription would make no sense, so I settled on a one-time small purchase – I’ll report back on how it goes!</p>
<p>So now all there’s left to do is to point you toward the AppStore: go check out <a href="https://apps.apple.com/gb/app/tako-writer/id6749770199">Tako Writer</a> today and let me know on Mastodon any feedback! I’m already thinking about a few more features to build in overtime, today is just the first milestone on this new journey!</p>
]]></content>
  </entry>
  
  <entry>
    <title>Over engineering Solutions to Fight Procrastination?</title>
    <link href="https://matteodallombra.net/2025/08/17/over-engineering-solutions-to-fight-procrastination/"/>
    <id>https://matteodallombra.net/2025/08/17/over-engineering-solutions-to-fight-procrastination/</id>
    <updated>2025-08-17T14:04:27.000Z</updated>
    <summary>Am I the only one that thinks this way? I’m currently typing this from my next app (I know..0 to 1000 in a minute!), something that I’ve built to post more on this blog. Why? Because my head kept telling me that if only I had the right tools, I would 100% write more. It’s …</summary>
    <content type="html"><![CDATA[<p>Am I the only one that thinks this way?</p>
<p>I’m currently typing this from my next app (I know..0 to 1000 in a minute!), something that I’ve built to post more on this blog. Why? Because my head kept telling me that if only I had the right tools, I would 100% write more. It’s not at all because I’ve been finding any good excuse not to write!</p>
<p>In all fairness to me, I do think sometimes my blog posting routing was sub-optimal, pretty much just relying on the web editor behind the scene in WordPress. I wanted to have an easier and more convenient and offline option to jot down my thoughts to then easily be able to publish them on the open web.</p>
<p>I started by thinking the Takos feature built in my first app <a href="/note-tako/">Note Tako</a> would do the job, but I think it was too detached from the entire process to actually be a good option.</p>
<p>So..once again I went down the rabbit hole of over-engineering a solution for what many people would consider a non-issue!</p>
<p>Sorry for the tease, but I’m still only testing how to properly completing the over-engineering process, so watch this space!</p>
]]></content>
  </entry>
  
  <entry>
    <title>Mirror mirror on the wall, who’s the best model of all?</title>
    <link href="https://matteodallombra.net/2025/08/14/mirror-mirror-on-the-wall-whos-the-best-model-of-all/"/>
    <id>https://matteodallombra.net/2025/08/14/mirror-mirror-on-the-wall-whos-the-best-model-of-all/</id>
    <updated>2025-08-14T16:31:39.000Z</updated>
    <summary>Let me add my two cents on the international nightmare of the model picker! Since the launch of GPT-5, Open AI has drastically simplified the model picker, to the point that initially there wasn’t really one anymore. If you ask me, that was the right move. One of the things I never liked about the …</summary>
    <content type="html"><![CDATA[<p>Let me add my two cents on the international nightmare of the model picker!</p>
<p>Since the launch of GPT-5, Open AI has drastically simplified the model picker, to the point that initially there wasn’t really one anymore. If you ask me, that was the right move. One of the things I never liked about the UI of ChatGPT was that model picker, mostly because the names of the models never made any sense.</p>
<p>o3 was better than 4, but not necessarily same as 4.5? What?</p>
<p>I was super happy when it became just 5. Nice and simple and let’s be honest: if we are aiming for AGI, shouldn’t these models be clever enough to figure out independently the best tool to pick to present the answer to my prompt? Seems like a pretty basic task to me!</p>
<p>It seems I was in the minorty as pretty much the same day OpenAI made a big U turn and brought back yet another type of model selector! Even less descriptive and more cryptic. But that wasn‘t enough as they also brought back <em>legacy models</em> for the 4o afficionados….</p>
<p>So in the span of 24 hrs they want from super minimalistic and simple to more complex than before GPT5.</p>
<p><a href="https://x.com/sama/status/1955438916645130740">Sam Altman tweeted (Xed?) this about the update:</a></p>
<blockquote>
<p>You can now choose between “Auto”, “Fast”, and “Thinking” for GPT-5. Most users will want Auto, but the additional control will be useful for some people.</p>
<p>[…]</p>
<p>4o is back in the model picker for all paid users by default. If we ever do deprecate it, we will give plenty of notice. Paid users also now have a “Show additional models” toggle in ChatGPT web settings which will add models like o3, 4.1, and GPT-5 Thinking mini. 4.5 is only available to Pro users—it costs a lot of GPUs.</p>
</blockquote>
<p>Seems like commitment issues from OpenAI took over right after this less than stellar launch.</p>
<p>Over-hyped and under-delivered. We probably need GPT6 to interact with GPT5 picker to solve this once and for all…</p>
]]></content>
  </entry>
  
  <entry>
    <title>I guess I am an App Developer now?</title>
    <link href="https://matteodallombra.net/2025/08/13/i-guess-i-am-an-app-developer-now/"/>
    <id>https://matteodallombra.net/2025/08/13/i-guess-i-am-an-app-developer-now/</id>
    <updated>2025-08-13T20:18:00.000Z</updated>
    <summary>It all started with these two renewals…the rest became a journey I didn’t expect. I have a lot of apps on my phone. With some of them I engage on a daily basis, sometimes multiple times a day. Some bring me joy, some stress, other are simply useful. Then there are some which are over-engineered …</summary>
    <content type="html"><![CDATA[<p>It all started with these two renewals…the rest became a journey I didn’t expect.</p>
<p>I have a lot of apps on my phone. With some of them I engage on a daily basis, sometimes multiple times a day. Some bring me joy, some stress, other are simply useful. Then there are some which are over-engineered for what they do. Or maybe, to put it in a better way, they are over-enginered for my needs.</p>
<p>The other things I have a lot of are subscriptions. Nowadays, pretty much any app that has some level of server components will have a subscription, which is fair, but some apps lately have morphed from their original simple scope into some kind of technological monster to offer features users didn’t necessarily asked for, to justify the subscription models.</p>
<p>Or maybe I’m just a simple person, that mostly requires some basic features to get things done?</p>
<p>The two apps above became for me clear examples of this trend. I’ve been using <a href="https://todoist.com">Todoist</a> and <a href="https://zerolongevity.com">Zero</a> for years. Both are great apps at their core, but over the years the costs for them crept up and up, features were jammed in, things that use to be simple became overly complex.</p>
<p>Todoist is surely more popular compared to Zero. The latter is at its core a Fasting counter app. You set a fasting window, you hit go and you see a nice circle progressively filling up. Easy right? Except for the fact that if you are not online the app won’t load. Why? Why do I need to be online to check a timer progress? And the worst part is that it’s not entirely true either. When you launch the app, I guess it trys to phone home somehow and when you are on a bad connection the app simply won’t open. But guess what: if you put your phone in Airplane mode, it launch fine!</p>
<p>I shouldn’t be too hard on this app as it helped me massively on my quest to loose and keep my weight down – but now that I‘ve built the habit, I started questioning the need for that subscription.</p>
<p>Todoist is slightly different. It’s no doubt a great app, for power users, very flexible and customisable. But that‘s also the biggest downfall from my perspective. Notetaking is an art. But for me it also has to be simple and efficient, as if it becomes a barrier, it becomes a chore, not a tool. I was finding myself managing the app first, and getting lost in trying to manage my tasks. Plus I was finding difficult adapting the app metaphor to my mental model.</p>
<p>So guess what? I over-engineered the solution to both – introducing <a href="https://apps.apple.com/app/id6749778343">Note Tako</a>, my mental model and fasting tracker translated into an iOS app.</p>
<p><img src="/assets/uploads/2025/08/IMG_0558-1024x536.webp" alt="Screenshot -- Screenshot" loading="lazy" decoding="async"></p>
<p>If Todoist and Zero are apps built for the masses, Note Tako is built for me. I translated at my best my current mental order and model in order to simply manage tasks and notes, plus the added benefit of the Fasting tracker. You may then ask why if the app is built for me, it’s on the AppStore?</p>
<p>That is purely a matter of personal satisfaction. After the effort of visualising the app, and building it, receiving that welcome to the AppStore email from Apple was quite a rush!</p>
<p>Having said that, the point of this “excercise” was the journey, not the destination. As I alluded in my last post about Vibe Coding, these new AI tools have opened up so many creative avenues in my head. Suddenly I have a way to translate in practice what up until recently was stuck in my head. It’s amazing what can be accomplished, even from someone that only has a very basic understanding of Swift. I had to learn pretty much every single Xcode error message, but who cares! It was fun and challenging and a new way of thinking. You suddenly have to learn a new language. No, not Swift itself. You need to learn the language of AI.</p>
<p>These services really start to perform well once you learn how to “talk to them”, and you quikcly realise you can’t simply use English (or whichever language you speak). You need to be efficient, direct and cristal clear in your language; funny enough all skills I’ve acquired over more than a decade in a business environment dominated by emails!</p>
<p>As I’ve alluded in my other post, no matter how big or small your idea is, I urge you to give Vibe Coding a try – it is already and it will continue to become transformative at a super fast rate. And you won’t believe how satisfying it can be until you try!</p>
<p>So what can you do with Note Tako?</p>
<p>At its core the app is a task management and note taking app. You see a simple list of all your tasks, which if you want to can aggregate in folders or Projects. The list is simple and compact and allows you quickly reschedule items or marked them as important. And when you mark something as important a new icon shows up in the top right corner, giving you immediate access to important tasks no matter how far in the future these may be (or even if they don’t have a due date). This was a major feature for me. I have a lot of tasks, but some are more important than others. With other apps I struggled in finding a way to properly keep track of those and not be surprised by them when they suddenly popped up as the next day item. So now they are front and centre!</p>
<p>Then, you can take long form notes, which I called Takos in the app. Why? No idea, just loved the name!</p>
<p>You can write as much as you like, assign them to the same project as tasks. But then you can also schedule them as Tasks of their own. This was something else that I wanted to improve. Sometimes the a simple task is not enough, I want to take longer notes, but also I want to be reminded to take action from those notes. So far I had to spread these across different apps, making it clunky. Now they are all in one and I’m loving it!</p>
<p>Finally, yes there is a fasting tracker. Yes I know it doesn’t really makes sense, or at least it doesn‘t match directly with the main spirit of the note taking, but once again, this app was built for myself and I wanted to combined two of my daily used apps into one single command centre.</p>
<p>Which also brings me to the price: the app is free. I didn’t go into this to become a millionaire (!), I did this as I had a hitch to scratch and I’m great at over-engineer solutions for seemigly simple “problems”! Plus, it wouldn’t feel good to charge for an app that really isn’t built for the masses.</p>
<p>But if you want to try it, please go ahead! I‘ve built in leveraging only Apple first party technology, leveraging CloudKit to be private, fast and reliable. I’ve been using it daily for the last month while completing the development and it’s been a blast!</p>
<p>Finally, now that the app is out, where do I go from here? Well, I do have few more features I want to try and incorporate, including a web version (which is proving quite a challenge!) and the opton to forward emails for them to become actionable Takos. But I wanted to draw a line with a series of basic, 1.0 features, to get over the line of the publishing, and then grow from there as I was feeling I was procrastinating that step trying to build too many features all at once!</p>
<p>As I said at the beginning of this post, it has been a wonderful journey, one that I think it’s only at the beginning and I can’t wait to see the next chapter!</p>
<p><a href="/note-tako">Try It Now!</a></p>
]]></content>
  </entry>
  
  <entry>
    <title>In Appreciation of Vibe Coding</title>
    <link href="https://matteodallombra.net/2025/08/09/in-appreciation-of-vibe-coding/"/>
    <id>https://matteodallombra.net/2025/08/09/in-appreciation-of-vibe-coding/</id>
    <updated>2025-08-09T17:29:46.000Z</updated>
    <summary>Vibe coding is a conversational, AI-first programming paradigm popularized by Andrej Karpathy in early 2025, where developers provide natural language prompts to LLMs to generate working code, and the user guides and refines it—often without direct, line-by-line programming. It’s great for rapid prototyping and non-experts, but carries risks in terms of code quality, comprehension, and …</summary>
    <content type="html"><![CDATA[<blockquote>
<p>Vibe coding is a conversational, AI-first programming paradigm popularized by Andrej Karpathy in early 2025, where developers provide natural language prompts to LLMs to generate working code, and the user guides and refines it—often without direct, line-by-line programming. It’s great for rapid prototyping and non-experts, but carries risks in terms of code quality, comprehension, and security when used in serious development contexts.</p>
</blockquote>
<p>I guess it’s only fitting to start this post by using a definition of <em>Vibe Coding</em> summarised by ChatGPT-5. I know for sure that I’ve spent quite a lot of time guiding and refining a black box toward a goal I had pictured in my mind.</p>
<p>This very new theme for the blog has been expeditely provided by <a href="https://chatgpt.com/codex">Cortex</a>, which has become my favourite tool of all. As I’m typing this, Cortex is busy behind the scenes fixing bugs and writing new features across 3 projects: 1 on the web and two for iOS.</p>
<p>And this is where the very last line of the definition above comes into play: <em>carries risks in terms of code quality, comprehension, and security</em></p>
<p>On my web project, I do know what I’m talking about, I can review the code, understand way better how to steer the AI in the correct direction for the result I need, and I can fix issues faster as I can understand where things are going wrong.</p>
<p>On the iOS side of things, I’ll be honest, I’m in the complete darkness. I’m following a similar process, still describing in plain english what I want the app to do and look like, but I have no recourse when I invevitably have to spend an hour fixing Xcode errors or if the result has been interpreted slightly differently from what I wanted originally. There are way more trials and errors, and still, I’ve managed to get satisfying (for me) results.</p>
<p>The debate online remains mixed. My own feelings about it remain mixed. But there is no doubt this technology is unlocking more and more creative avenues for me. Yes it can be frustrating, but it’s also immensly fun and satisfying once you get to the destination you had set off to find!</p>
<p>I’ll keep exploring and I’ll keep fixing bugs, as long as I’ll keep having fun with the results! If you haven’t tried yet, but you have an idea you’d like to try, I’d urge you to give it a go – the entry point is very affordable and I’m sure you’ll find great satisfaction in having the result of your work becoming something tangible for the world to see!</p>
]]></content>
  </entry>
  
  <entry>
    <title>Project Tako Update #5 – Tinkering with the Case</title>
    <link href="https://matteodallombra.net/2025/06/02/project-tako-update-5-tinkering-with-the-case/"/>
    <id>https://matteodallombra.net/2025/06/02/project-tako-update-5-tinkering-with-the-case/</id>
    <updated>2025-06-02T17:47:41.000Z</updated>
    <summary>Hello and welcome back to the regularly scheduled updates for Project Tako! Since the hardware is all in place and the software is 90% there, I’ve started tinkering with a possible case design to bring it all together. I’ll be honest, I’m not super happy (yet) with the design I’ve came up with. Main reason …</summary>
    <content type="html"><![CDATA[<p>Hello and welcome back to the regularly scheduled updates for Project Tako! Since the hardware is all in place and the software is 90% there, I’ve started tinkering with a possible case design to bring it all together.</p>
<p>I’ll be honest, I’m not super happy (yet) with the design I’ve came up with. Main reason being is that I’m terrible at creative design, but I guess projects like this one could be gateway to experiment and improve.</p>
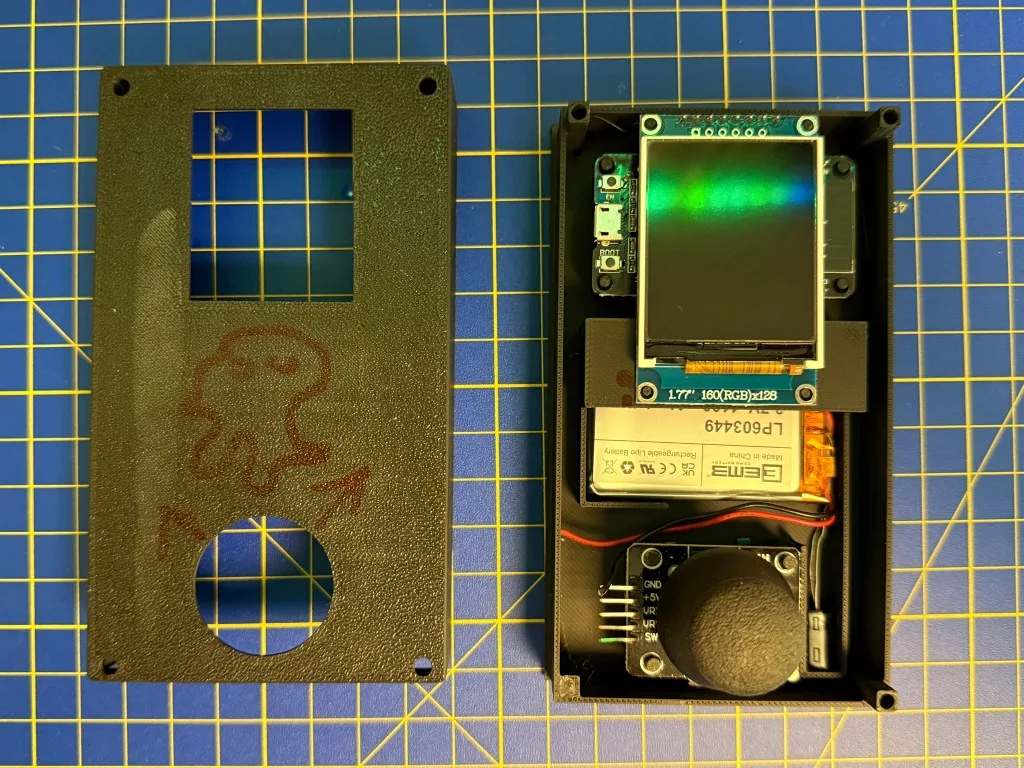
<p>My very first attempt was mainly the about the “inside” frame, just trying to figure out the relationship between the various hardware pieces.</p>
<p><img src="/assets/uploads/2025/06/IMG_2878.webp" alt="" loading="lazy" decoding="async"></p>
<p>Very squared and with zero details, but it was a good start to figure out the next steps and also to start planning (or at least thinking about) cable routes and lengths to join all the components together. This gives me a great blueprint.</p>
<p>You can also see some notes I’ve made on this first design, mainly to note areas where the fit could be improved. The opening for the joystick wasn’t enough to let it operate without hitting on the edges. That “ghost” figure in the middle is where I wanted to place the Tako logo to make better use of the space.</p>
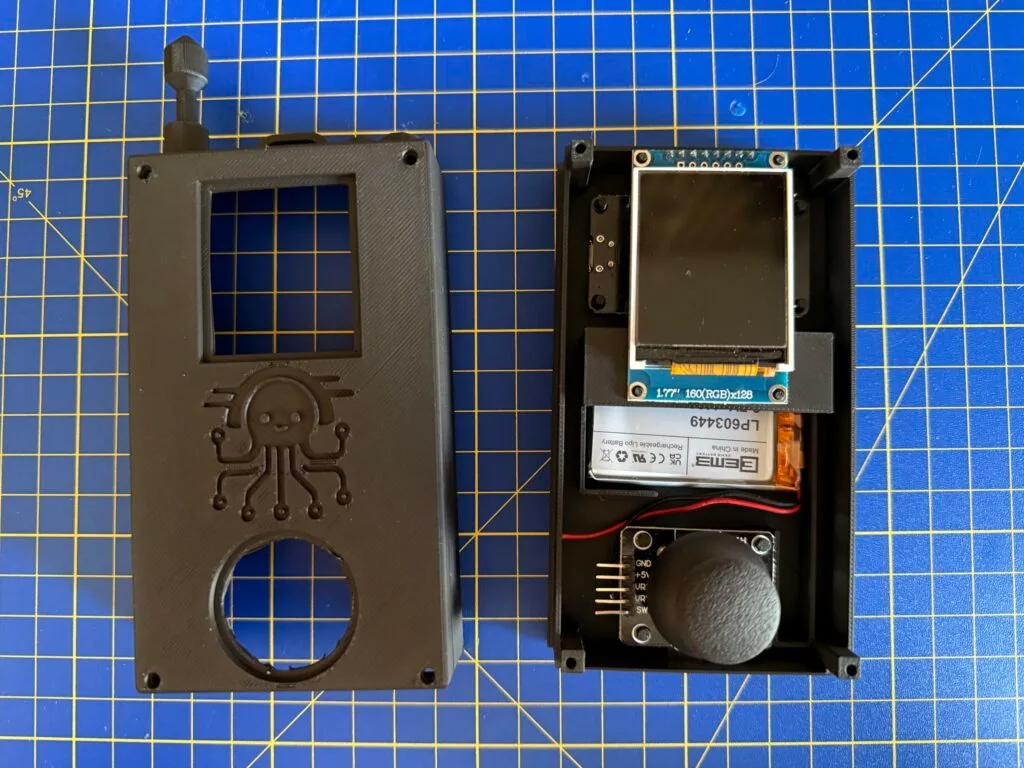
<p>Which takes us to the current revision of the case:</p>
<p><img src="/assets/uploads/2025/06/IMG_2879-scaled-e1748885641352-1024x768.webp" alt="" loading="lazy" decoding="async"></p>
<p>The main changes in the internal chassis are about reversing the position of the EPS board, and better connections for the display, plus the opening for the joystick is now enough not to impede the operation.</p>
<p>The Tako logo is nice, but the print quality came out all wrong. I need to change the orientation of the part and avoid extra supports that came out terrible.</p>
<p>I’ve also added some “details” on top, trying to overall go for a “space/Star Wars” themed communicator device. I’m already thinking about playing with different insert colors, to bring out some accents, and maybe even adding some LEDs (functional and not just decorative), although that may not be a great idea for the battery usage!</p>
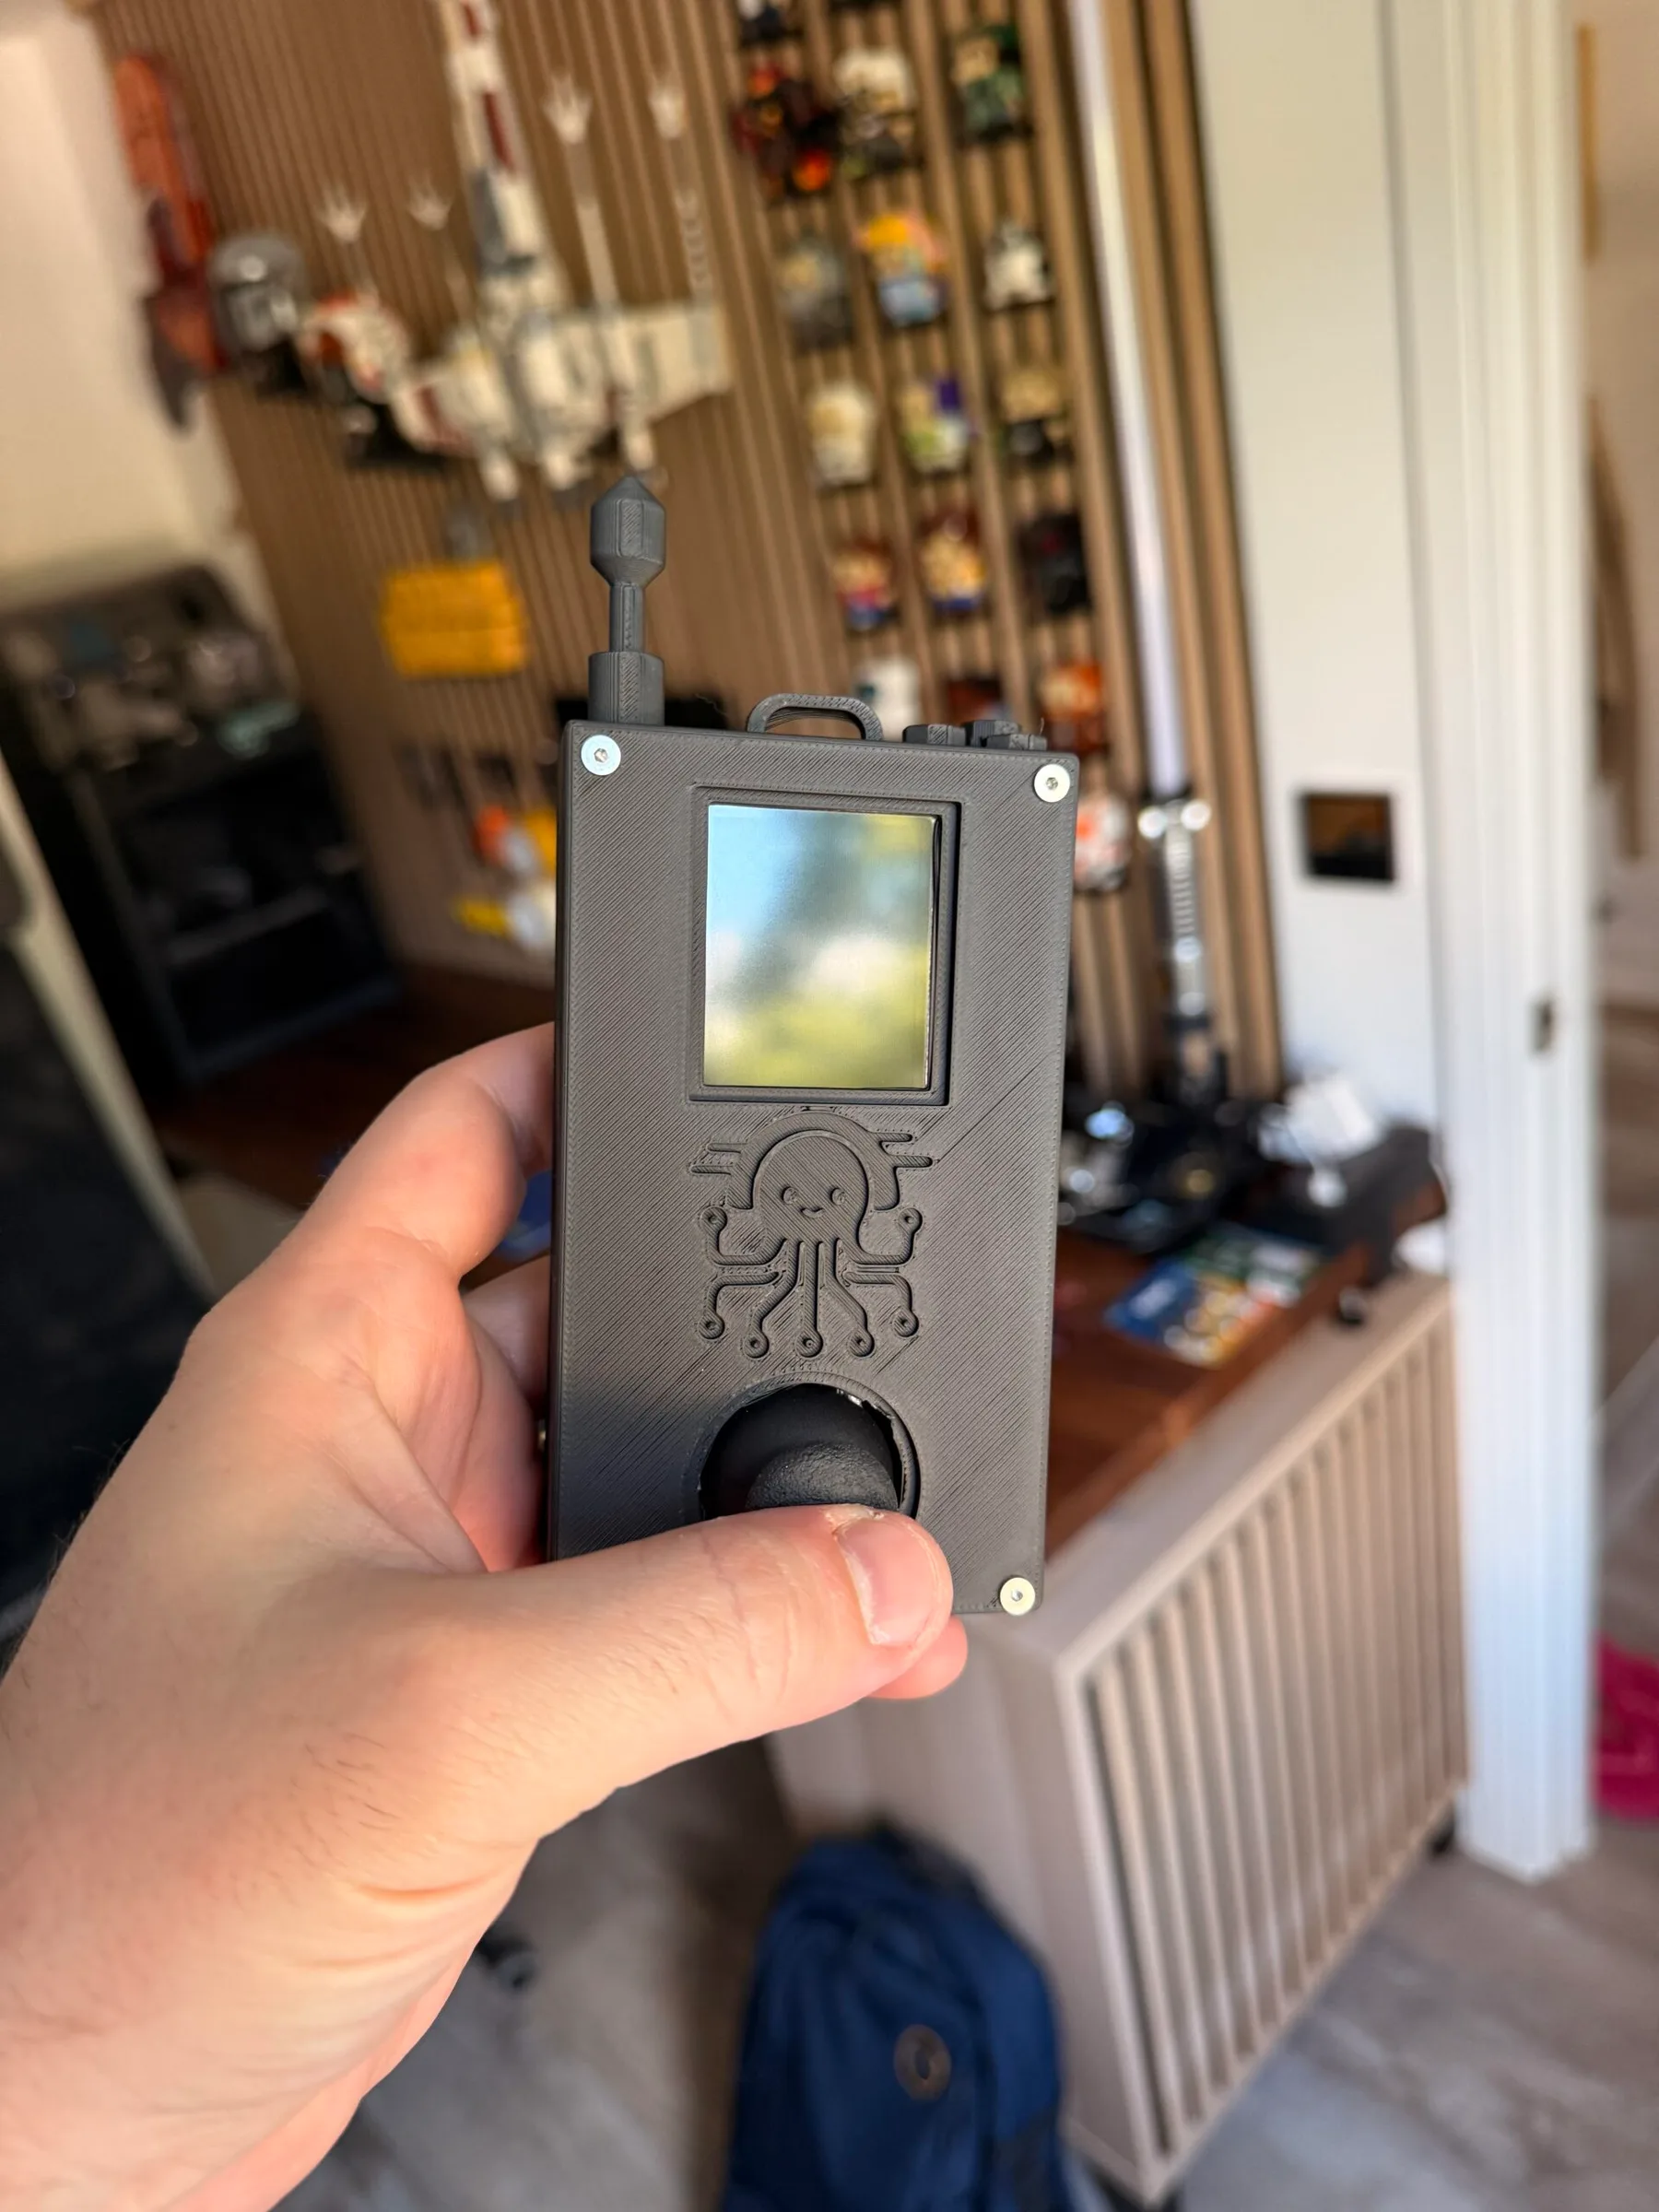
<p><img src="/assets/uploads/2025/06/IMG_2881-scaled.webp" alt="" loading="lazy" decoding="async"></p>
<p>When you put it all together, it really gives me warm fuzzy feelings!! I wasn’t sure about the screws on top and if it was going to be better to hide them underneath, but I think I like them (currently they are treading directly into the plastic) in view, again very space-retro!!</p>
<p>I’m very happy with the direction overall and especially with the decision of using a joystick for navigation instead of buttons, it really gives it a more futuristic feeling (in my view).</p>
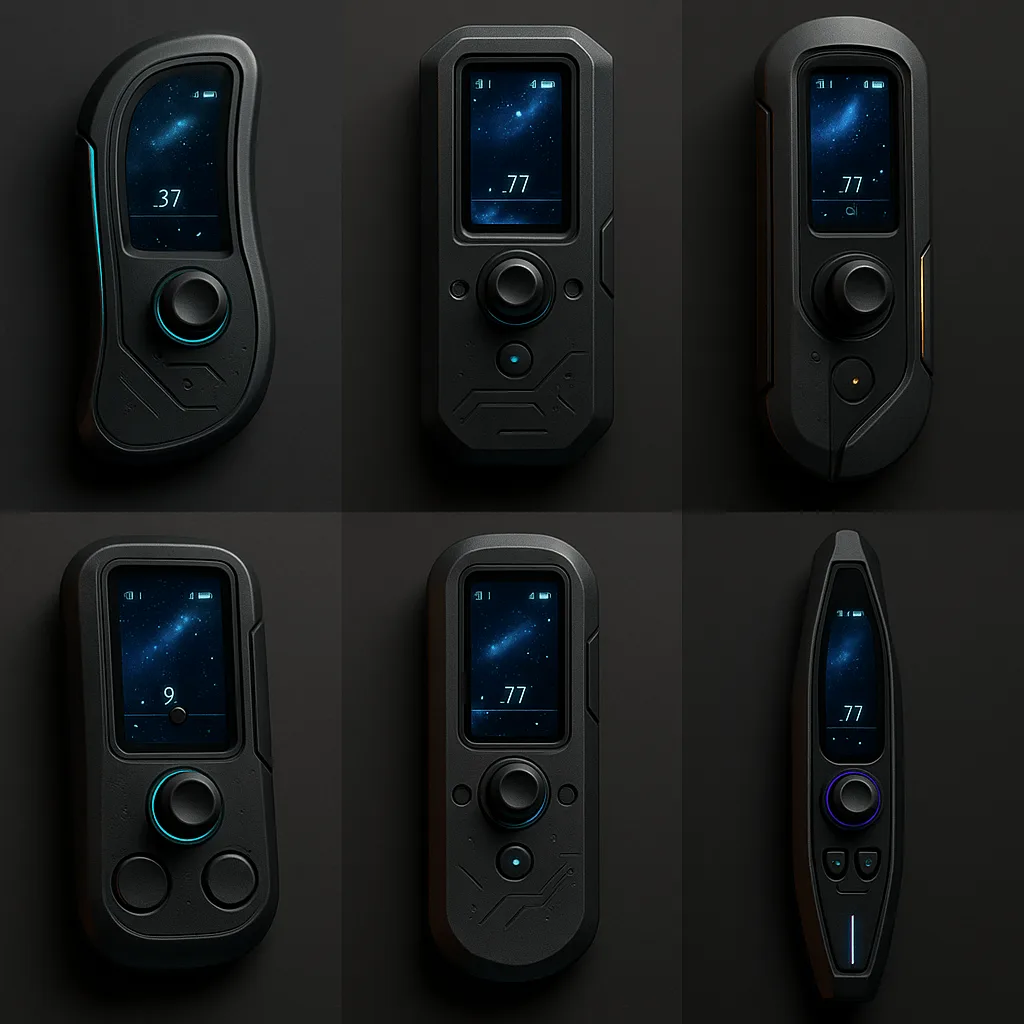
<p>I did ask ChatGPT for some design inspirations in order to make it less of a squared box, I got only slightly less squared results, so definitely more work need to be done!</p>
<p><img src="/assets/uploads/2025/06/D99FC191-160B-400E-9D9C-1082485C039F.webp" alt="" loading="lazy" decoding="async"></p>
<p>Back to Shapr3d I go!</p>
<p>Happy tinkering!</p>
]]></content>
  </entry>
  
  <entry>
    <title>Project Tako Update #4 – Finally on the move!</title>
    <link href="https://matteodallombra.net/2025/05/21/project-tako-update-4-finally-on-the-move/"/>
    <id>https://matteodallombra.net/2025/05/21/project-tako-update-4-finally-on-the-move/</id>
    <updated>2025-05-21T17:37:18.000Z</updated>
    <summary>We are finally on the move!! I’ve been dreading some of the electrical circuits needed to make Tako an actual movable remote, but alas, here we are! As you will see from the video, all the wiring and soldering is still very rough, but I’m still learning so much on hardware and software that those …</summary>
    <content type="html"><![CDATA[<p>We are finally on the move!! I’ve been dreading some of the electrical circuits needed to make Tako an actual movable remote, but alas, here we are! As you will see from the video, all the wiring and soldering is still very rough, but I’m still learning so much on hardware and software that those are not my primary concerns yet.</p>
<iframe loading="lazy" class="youtube-player" width="640" height="360" src="https://www.youtube.com/embed/PSoTpQ_bqfM?version=3&amp;rel=1&amp;showsearch=0&amp;showinfo=1&amp;iv_load_policy=1&amp;fs=1&amp;hl=en-US&amp;autohide=2&amp;wmode=transparent" allowfullscreen="true" style="border:0;" sandbox="allow-scripts allow-same-origin allow-popups allow-presentation allow-popups-to-escape-sandbox"></iframe>
<p>As we all know, these are just temporary solutions, that will be 100% fixed once we moved to the final assembly stage 😉</p>
<p>You may also notice another small UI improvements: if there are many devices in a room, there is now a nice scroll bar on the right end side of the screen to clearly indicate there is more that can be seen and you can easily scroll through.</p>
<p>Yes, the responsiveness of the joystick still needs to be fine tuned as there are still some missed inputs, but I believe this can be fixed by tuning the code and also by improving and shortening the wiring, and those will all be the next stages of the projects, alongside an implementation of a visual battery indicator on screen.</p>
<p>It’s moving slowly, but it’s moving and I’m super proud of the results so far!</p>
<p>Happy tinkering!</p>
]]></content>
  </entry>
  
  <entry>
    <title>Project Tako Update #3 – Joystick Navigation and more mobile prototype</title>
    <link href="https://matteodallombra.net/2025/05/01/project-tako-update-3-joystick-navigation-and-more-mobile-prototype/"/>
    <id>https://matteodallombra.net/2025/05/01/project-tako-update-3-joystick-navigation-and-more-mobile-prototype/</id>
    <updated>2025-05-01T19:55:17.000Z</updated>
    <summary>Hello again! It has been a while since the previous update, but holidays and small home office renovations came in between me and Tako!! Not to worry, this update is quite a doozy! As you’ve seen in the title, there is a brand new navigation system for Tako: a joystick! I was somewhat dissatisfied with …</summary>
    <content type="html"><![CDATA[<p>Hello again! It has been a while since the previous update, but holidays and small home office renovations came in between me and Tako!!</p>
<p>Not to worry, this update is quite a doozy!</p>
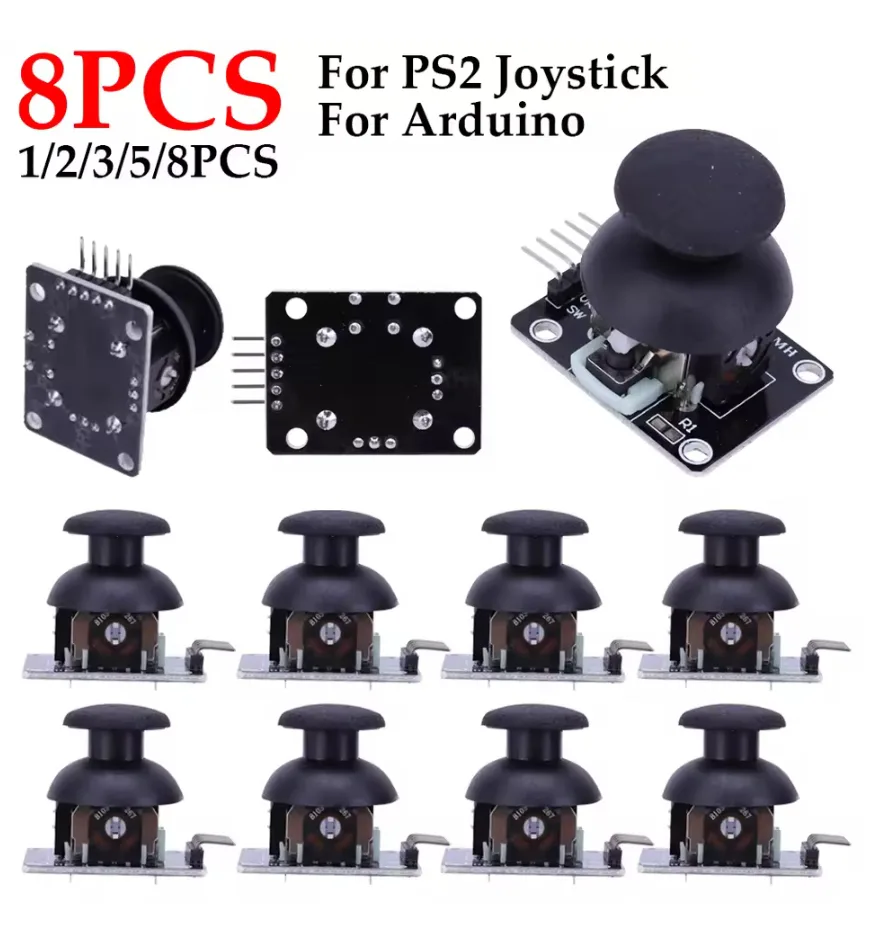
<p>As you’ve seen in the title, there is a brand new navigation system for Tako: a joystick! I was somewhat dissatisfied with the buttons, as they felt a bit more clunky than expected for moving around the UI. So I went on Aliexpress and looked for alternatives input methods and found this simple joystick as a (somewhat) plug/play replacement.</p>
<p><a href="https://s.click.aliexpress.com/e/_oox4QI9">This is what I found (affiliate link)</a></p>
<p><img src="/assets/uploads/2025/05/IMG_0512.webp" alt="" loading="lazy" decoding="async"></p>
<p>The plug/play replacement code, wasn’t so much plug/play, especially struggling in lowering the lag when moving around. You can see in the video below that it’s ok, but still not great. More work needed to refine the input when moving around. The click input instead is immediate. Overall it’s a much better and more intuitive way to interface with the remote compared to the individual buttons, which I’m really happy with!</p>
<iframe loading="lazy" title="Project Tako - Update #3 - Joystick Navigation #homeassistant #diy #esphome" width="500" height="281" src="https://www.youtube.com/embed/0mz8qE9pVB4?feature=oembed" frameborder="0" allow="accelerometer; autoplay; clipboard-write; encrypted-media; gyroscope; picture-in-picture; web-share" referrerpolicy="strict-origin-when-cross-origin" allowfullscreen=""></iframe>
<p>I’ve also updated <a href="https://github.com/matteodallombra/Project-Tako/releases/tag/2025.5.1">my GitHib repo with the latest version of the code</a>, if you are following along on this crazy journey!</p>
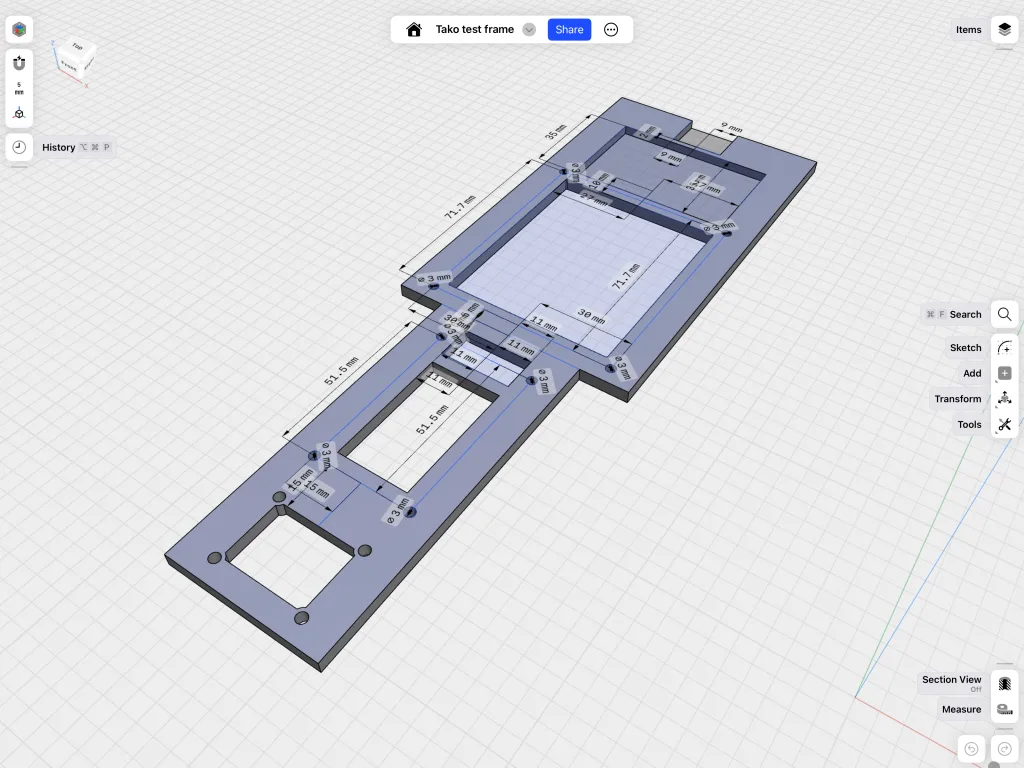
<p>You may have also noticed I’m moved away from a breadboard, as I’m also moving toward integrating a battery to finally go wireless (as a true remote should be!), so for now I’ve 3D printed a very simple support frame on which I’ve screwed the various components and the joystick navigation is already feeling like a massive upgrade in this new format.</p>
<p>The frame is nothing special, just a temporary support, but for those of you curious, here’s what it looks like:</p>
<p><img src="/assets/uploads/2025/05/IMG_0513.webp" alt="" loading="lazy" decoding="async"></p>
<p>Next on the to-do list is a first test with a battery and USB-C port for recharging! I’ve already have the parts with me, so the next update should arrive a bit faster!</p>
<p>Happy tinkering!</p>
]]></content>
  </entry>
  
  <entry>
    <title>Tapestry is the best front end for the internet</title>
    <link href="https://matteodallombra.net/2025/04/17/tapestry-is-the-best-front-end-for-the-internet/"/>
    <id>https://matteodallombra.net/2025/04/17/tapestry-is-the-best-front-end-for-the-internet/</id>
    <updated>2025-04-17T13:45:02.000Z</updated>
    <summary>Well, I don’t know why am I surprised about this, but The Iconfactory did it again! The recently release Tapestry app has proven to be the best new app for Internet consumers in recent memory. And especially after yesterday’s update V1.1, it has truly cemented its place on my homescreen! As you can see from …</summary>
    <content type="html"><![CDATA[<p>Well, I don’t know why am I surprised about this, but <a href="https://iconfactory.com/">The Iconfactory</a> did it again! The recently release <a href="https://usetapestry.com/">Tapestry app</a> has proven to be the best new app for Internet consumers in recent memory. And especially after yesterday’s update V1.1, it has truly cemented its place on my homescreen!</p>
<p><img src="/assets/uploads/2025/04/IMG_1993.webp" alt="" loading="lazy" decoding="async"></p>
<p>As you can see from the screenshot above, cementing a place on my homescreen is no easy feat. Since we got the option to place icons wherever we want, I’ve drastically reduced what makes the cut, in favour of search for anything else.</p>
<p>I’ve always been a great consumer of the internet via RSS, and my main social media of choice was Twitter. With those two mediums, I had a very good hold on news of interest: tech, sport, major events. But since the implosion of Twitter and the rise of the fediverse, I think many of us consumers of the internet got thrown in the same predicament: where do you go? which app do you download?</p>
<p>Thanks to various mirror accounts, I managed to move fairly easily to Mastodon, bridging the sports accounts (which are still going strong on Twitter). RSS never really changed, but some of the apps got “complacent”, not being engaging to use anymore. Then throw Reddit into the mix. I’ve always been a lurker (only recently starting to contribute more) and I was one of the many users that was left stranded by the demise of Apollo, being forced to use the ungodly official Reddit app.</p>
<p>So in essence, my homescreen and app usage was a mess. Multiple apps, not really happy with the mix overall, making it a chore rather than a pleasure the staying on top of news.</p>
<p>Enter Tapestry! The clever people of The Iconfactory managed to find, in my opinion, the perfect recipe for media consumption: a unified stream of all the sources you can possibly think and imagine, ordered chronologically, with no algorithm in sight!</p>
<p>Being a self confessed “internet completionist”, the main requirement for any app I’ve ever used was to have a robust sync and memory, allowing me to consistently pick up where I left and continue perusing the news. To compensate for this, over the years I ended up having duplicate news sources across different medias, as a way to make sure I wasn’t going to miss anything – the downside of course was seeing the same thing over and over across different timelines.</p>
<p>This was the first great benefit of Tapestry: by putting everything together in the same stream, it immediately highlighted where the duplicates were and helped me rationalise my sources, streamlining my consumption.</p>
<p>And now thanks to the latest update, that enables custom feeds, I have 3 social media apps in 1: one custom timeline with RSS, one for Mastodon and the last one for a few subreddits I like (HomeAssistant &amp; 3d printing!).</p>
<p>Can’t wait to see where the app will go next, but you’ve got a super fan already!!</p>
]]></content>
  </entry>
  
  <entry>
    <title>Project Tako Update #2 – Better UI &amp; GitHub Repo</title>
    <link href="https://matteodallombra.net/2025/04/08/project-tako-update-2-better-ui-github-repo/"/>
    <id>https://matteodallombra.net/2025/04/08/project-tako-update-2-better-ui-github-repo/</id>
    <updated>2025-04-08T20:45:52.000Z</updated>
    <summary>Progress on Project Tako continues! I’m having a lot of fun (but also frustrating) conversations with ChatGPT in order to continue fine-tuning the code for this. I guess I’m fully embracing the “vibe-coding” approach with this, using AI to continuously iterate and move the code forward. The frustrating part is linked to the AI not …</summary>
    <content type="html"><![CDATA[<p>Progress on Project Tako continues! I’m having a lot of fun (but also frustrating) conversations with ChatGPT in order to continue fine-tuning the code for this.</p>
<p>I guess I’m fully embracing the “<a href="https://x.com/karpathy/status/1886192184808149383?lang=en">vibe-coding</a>” approach with this, using AI to continuously iterate and move the code forward. The frustrating part is linked to the AI not always grasping the concepts I’m trying to move forward, therefore still requiring a lot of direct input and manipulation of the code (at least I have an idea of what’s going on in the code!).</p>
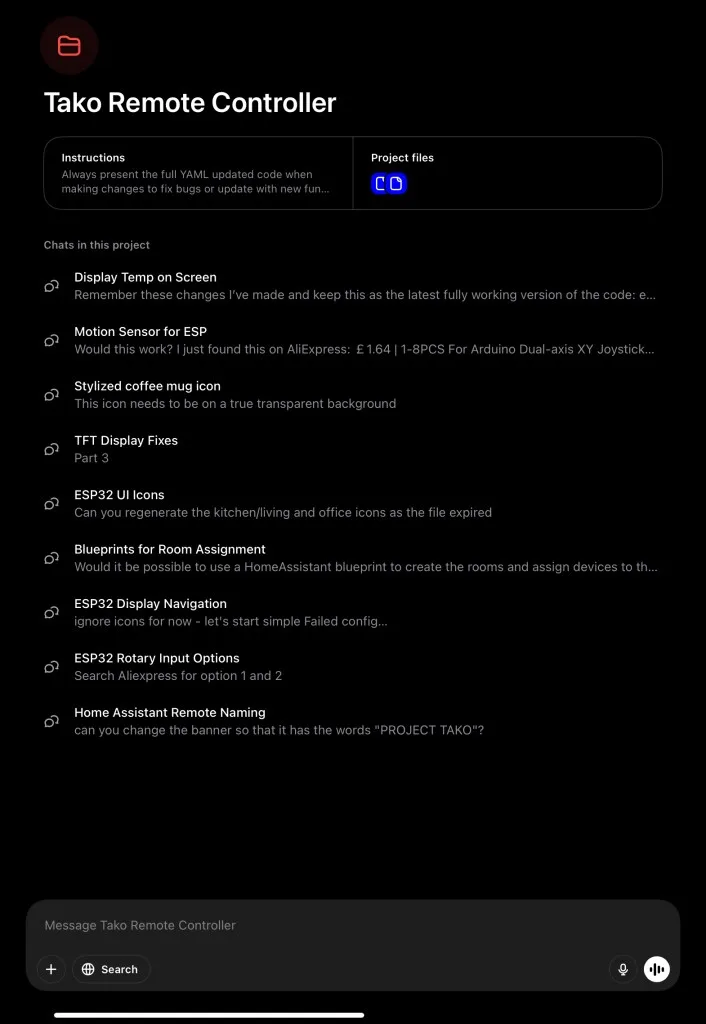
<p>A great tool I’m really enjoying is the “project” feature, where ChatGPT can reference different conversations all linked underneath the same umbrella. This way you can keep topics separate (hardware, software, graphics…), but they are still linked to each other and used to move the entire project forward.</p>
<p><img src="/assets/uploads/2025/04/IMG_0504-1.webp" alt="" loading="lazy" decoding="async"></p>
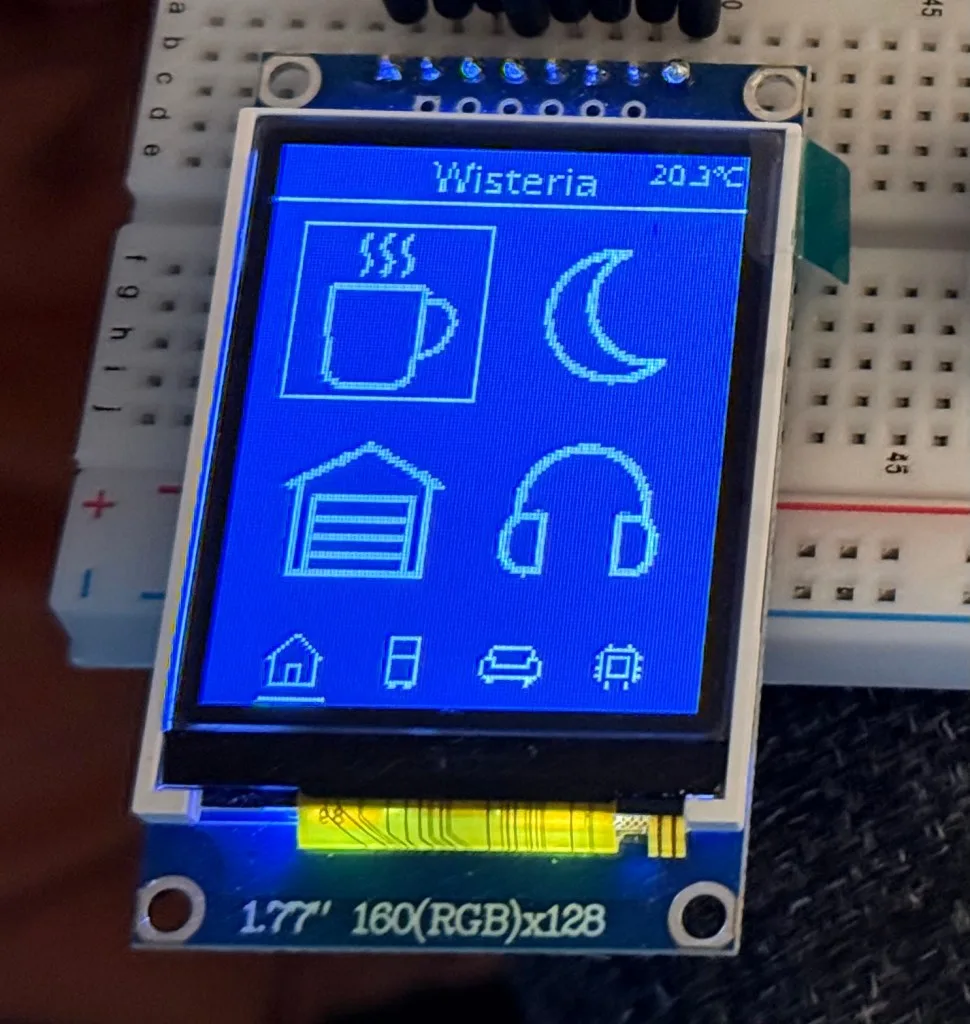
<p>Speaking of code and UI, here are the main updates:</p>
<ul>
<li>New starting dashboard: control scenes (good morning/night, garage door, house music)</li>
<li>Average house temperature displayed on each screens</li>
<li>Better icons for the dashboard and the navigation at the bottom</li>
</ul>
<p>Icon design took a while to get right. First I simply asked ChatGPT to generate icons all in the same style and directly at the final scale for the UI, but they looked crap. So in the end I asked AI to generate nice big icons, which I then manually re-sized to the correct scale for the project. Everything looks much nicer now!</p>
<p><img src="/assets/uploads/2025/04/IMG_1988.webp" alt="" loading="lazy" decoding="async"></p>
<p>It’s very clear (at least to me) what each icon is meant to represent, plus some of them are dynamic. For example, the garage icon will change to clearly show the open/close state. Same for the radio icon. When it’s playing, it will change from headphones to a “mute” icon, making it obvious what would happen if you click that icon.</p>
<p>Final update software wise is the start of the integration of Apple TV control. One button is now dedicated to switch from rooms control to each TV and back. Every time you press on the dedicated button it will cycle through all options. Each TV screen will show the state of the Apple TV (playing or idle) and in theory the buttons should be remapped to now influence UI navigation and playback control on the TV.</p>
<p>I say in theory as for now the only button that works as intended is the enter button that turns into play/pause control, but I haven’t found a way yet to have the other buttons controlling the rest of the UI or the playback control – a fight for another day!</p>
<p>The truly final update for today is that the code and icons are now available on GitHub if you are curious, you want to follow along or you want to spin your own version of Tako: <a href="https://github.com/matteodallombra/Project-Tako">https://github.com/matteodallombra/Project-Tako</a></p>
<p>This repo will also be the place where all code updates will be managed from now on as it’s way better than pasting code here on WordPress!</p>
<p>See you at the next update – Happy Tinkering!</p>
]]></content>
  </entry>
  
  <entry>
    <title>Project Tako Update #1 – Room Navigation</title>
    <link href="https://matteodallombra.net/2025/04/02/project-tako-update-1-room-navigation/"/>
    <id>https://matteodallombra.net/2025/04/02/project-tako-update-1-room-navigation/</id>
    <updated>2025-04-02T17:01:40.000Z</updated>
    <summary>It’s only been a few days since the intro to the project, but I’ve already worked on a UI update: room navigation. As I have a decent amount of devices spread around the house, I wanted an easy way to get to all of them without having to deal with one long list. So, I …</summary>
    <content type="html"><![CDATA[<p>It’s only been a few days since the intro to the project, but I’ve already worked on a UI update: room navigation. As I have a decent amount of devices spread around the house, I wanted an easy way to get to all of them without having to deal with one long list.</p>
<p>So, I started tinkering with the idea of room navigation and I managed to get to this simple setup.</p>
<iframe loading="lazy" class="youtube-player" width="640" height="360" src="https://www.youtube.com/embed/hE6L_fbscKk?version=3&amp;rel=1&amp;showsearch=0&amp;showinfo=1&amp;iv_load_policy=1&amp;fs=1&amp;hl=en-US&amp;autohide=2&amp;wmode=transparent" allowfullscreen="true" style="border:0;" sandbox="allow-scripts allow-same-origin allow-popups allow-presentation allow-popups-to-escape-sandbox"></iframe>
<p>Listen how clicky those buttons are!!</p>
<p>For now, I’m focusing purely on UI, navigation and interaction with HA. You can also see it’s all very snappy and the on/off toggle happens as fast as it would if I went to the switch on the wall.</p>
<p>Also, currently everything is hardcoded in the yaml code, but ideally I would want to get to a point where maybe a Blueprint could allow for an easier setup and management of the remote, so it’s easier to pull in new device, or remove old ones.</p>
<p>You may have also noticed the Apple TV control is not there. I completely removed it for now, as in my original POC it wasn’t really working at all. I’m breaking down the project in smaller chunks, making each step more manageable. So for now it’s about home control only.</p>
<p>If you are interested, you can check out the code so far:</p>
<pre><code>spi:
  clk_pin: GPIO18
  mosi_pin: GPIO23

display:
  - platform: st7735
    id: tft_display
    model: &quot;INITR_BLACKTAB&quot;
    device_width: 128
    device_height: 160
    col_start: 0
    row_start: 0
    update_interval: 500ms
    cs_pin: GPIO15
    dc_pin: GPIO22
    reset_pin: GPIO4
    rotation: 0
    lambda: |-
      const int item_height = 36;
      const int left_padding = 4;
      const int top_padding = 6;
      const int content_width = 120;
      const int max_chars_per_line = 18;

      const int total_pages = 3;
      const std::string room_names[total_pages] = {&quot;Kitchen&quot;, &quot;Living Room&quot;, &quot;Office&quot;};

      struct Device {
        std::string name;
        std::string entity_id;
      };

      std::vector&lt;Device&gt; pages[total_pages] = {
        { {&quot;Couch Light&quot;, &quot;light.kitchen_light_switch_switch&quot;}, {&quot;Spotlights&quot;, &quot;light.kitchen_light_switch_switch_2&quot;} },
        { {&quot;Ceiling Lights&quot;, &quot;switch.living_room_light_switch&quot;} },
        { {&quot;Ceiling Lights&quot;, &quot;switch.magic_switch_s1e_52d3_switch_1&quot;} }
      };

      int page = id(current_page) % total_pages;
      const auto&amp; devices = pages[page];
      int index = id(selected_index) % devices.size();

      // Draw header
      it.printf(64, 0, id(font2), TextAlign::TOP_CENTER, &quot;%s&quot;, room_names[page].c_str());
      it.line(0, 16, 128, 16, Color::WHITE);

      // Helper: word-wrap
      auto split_name = [](const std::string &amp;text, int max_len) -&gt; std::pair&lt;std::string, std::string&gt; {
        if (text.length() &lt;= max_len) return {text, &quot;&quot;};
        size_t split_pos = text.rfind(' ', max_len);
        if (split_pos == std::string::npos) split_pos = max_len;
        std::string first = text.substr(0, split_pos);
        std::string second = text.substr(split_pos);
        if (second[0] == ' ') second = second.substr(1);
        return {first, second};
      };

      // Render devices
      int start_y = 20;
      for (int i = 0; i &lt; devices.size(); i++) {
        int y = start_y + i * item_height;
        bool selected = (i == index);
        auto [line1, line2] = split_name(devices[i].name, max_chars_per_line);

        if (selected) {
          it.filled_rectangle(0, y, 128, item_height, Color::WHITE);
          it.printf(left_padding, y + top_padding, id(font2), Color::BLACK, TextAlign::TOP_LEFT, &quot;&gt; %s&quot;, line1.c_str());
          if (!line2.empty()) {
            it.printf(left_padding + 12, y + top_padding + 14, id(font2), Color::BLACK, TextAlign::TOP_LEFT, &quot;%s&quot;, line2.c_str());
          }
        } else {
          it.printf(left_padding, y + top_padding, id(font2), Color::WHITE, TextAlign::TOP_LEFT, &quot;  %s&quot;, line1.c_str());
          if (!line2.empty()) {
            it.printf(left_padding + 12, y + top_padding + 14, id(font2), Color::WHITE, TextAlign::TOP_LEFT, &quot;%s&quot;, line2.c_str());
          }
        }
      }

      // Page indicator at bottom
      std::string indicator = &quot;&quot;;
      for (int i = 0; i &lt; total_pages; i++) {
        indicator += (i == page) ? &quot;* &quot; : &quot;- &quot;;
      }
      it.printf(64, 158, id(font2), TextAlign::BOTTOM_CENTER, &quot;%s&quot;, indicator.c_str());

font:
  - file: &quot;OpenSans-Regular.ttf&quot;
    id: font1
    size: 16
  - file: &quot;OpenSans-Regular.ttf&quot;
    id: font2
    size: 12

globals:
  - id: selected_index
    type: int
    initial_value: '0'
  - id: current_page
    type: int
    initial_value: '0'

binary_sensor:
  - platform: gpio
    pin:
      number: GPIO27
      mode: INPUT_PULLUP
      inverted: true
    name: &quot;Up Button&quot;
    on_press:
      then:
        - lambda: |-
            std::vector&lt;int&gt; sizes = {2, 1, 1};
            int page = id(current_page) % 3;
            int max_index = sizes[page] - 1;
            id(selected_index) = (id(selected_index) + max_index) % (max_index + 1);

  - platform: gpio
    pin:
      number: GPIO26
      mode: INPUT_PULLUP
      inverted: true
    name: &quot;Down Button&quot;
    on_press:
      then:
        - lambda: |-
            std::vector&lt;int&gt; sizes = {2, 1, 1};
            int page = id(current_page) % 3;
            int max_index = sizes[page] - 1;
            id(selected_index) = (id(selected_index) + 1) % (max_index + 1);

  - platform: gpio
    pin:
      number: GPIO13
      mode: INPUT_PULLUP
      inverted: true
    name: &quot;Enter Button&quot;
    on_press:
      then:
        - homeassistant.service:
            service: homeassistant.toggle
            data:
              entity_id: !lambda |-
                std::vector&lt;std::vector&lt;std::string&gt;&gt; ids = {
                  {&quot;light.kitchen_light_switch_switch&quot;, &quot;light.kitchen_light_switch_switch_2&quot;},
                  {&quot;switch.living_room_light_switch&quot;},
                  {&quot;switch.magic_switch_s1e_52d3_switch_1&quot;}
                };
                int page = id(current_page) % 3;
                return ids[page][id(selected_index) % ids[page].size()];

  - platform: gpio
    pin:
      number: GPIO33
      mode: INPUT_PULLUP
      inverted: true
    name: &quot;Left Button&quot;
    on_press:
      then:
        - lambda: |-
            id(current_page) = (id(current_page) + 2) % 3;
            id(selected_index) = 0;

  - platform: gpio
    pin:
      number: GPIO32
      mode: INPUT_PULLUP
      inverted: true
    name: &quot;Right Button&quot;
    on_press:
      then:
        - lambda: |-
            id(current_page) = (id(current_page) + 1) % 3;
            id(selected_index) = 0;
</code></pre>
]]></content>
  </entry>
  
  <entry>
    <title>Introducing Project Tako – A Fully Custom Remote for Home Assistant</title>
    <link href="https://matteodallombra.net/2025/03/31/introducing-project-tako-a-fully-custom-remote-for-home-assistant/"/>
    <id>https://matteodallombra.net/2025/03/31/introducing-project-tako-a-fully-custom-remote-for-home-assistant/</id>
    <updated>2025-03-31T15:51:27.000Z</updated>
    <summary>Well, here we go again! As “simple” dashboard projects were not enough, I’ve decided to (re)embark on a new HA related mission: Project Tako! What is Project Tako, you ask? It’s my renewed quest on the never-ending journey for custom control of HA. Having apps on your phone or dashboards on your wall is nice, …</summary>
    <content type="html"><![CDATA[<p>Well, here we go again! As “simple” dashboard projects were not enough, I’ve decided to (re)embark on a new HA related mission: Project Tako!</p>
<p>What is Project Tako, you ask? It’s my renewed quest on the never-ending journey for custom control of HA. Having apps on your phone or dashboards on your wall is nice, but what about when you are not in front on any of those 🤣</p>
<p>Since the early days of Logitech Harmony, the idea of one remote to rule it all has always been fascinating to me. So now that I have a decently complex smart home setup, could the same concept work? A remote for the house?</p>
<p>In fairness, it’s not such a groundbreaking concept. On Aliexpress you can find a multitude of smart remotes, but they are all tied into specific ecosystems of smart devices, which is the opposite what we try to do with our own HA instances.</p>
<p>I was also partially inspired by this video, where a user showcased his own super custom home remote (minute 2:22 for the remote bit).</p>
<iframe loading="lazy" class="youtube-player" width="640" height="360" src="https://www.youtube.com/embed/pO7sn8flQZ4?version=3&amp;rel=1&amp;showsearch=0&amp;showinfo=1&amp;iv_load_policy=1&amp;fs=1&amp;hl=en-US&amp;autohide=2&amp;start=142&amp;wmode=transparent" allowfullscreen="true" style="border:0;" sandbox="allow-scripts allow-same-origin allow-popups allow-presentation allow-popups-to-escape-sandbox"></iframe>
<p>So, a few months ago I started messing around with some components I had laying around, to get to this mess!</p>
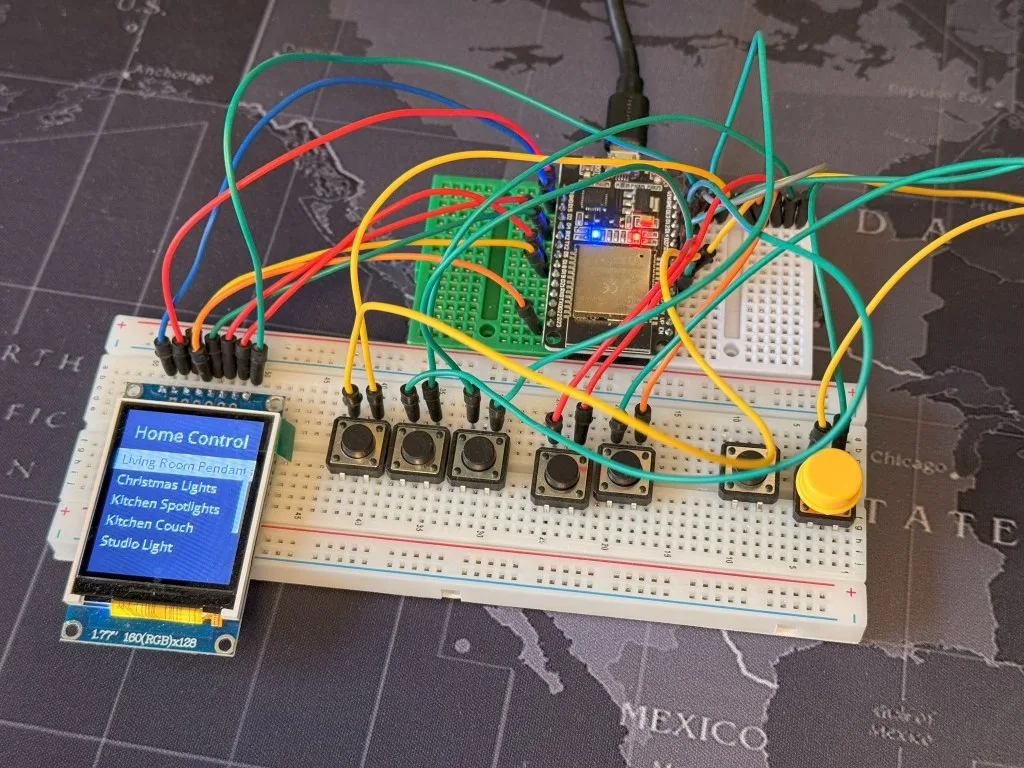
<p><img src="/assets/uploads/2025/03/Breadboard.webp" alt="" loading="lazy" decoding="async"></p>
<p>This post is absolutely not a showcase, it’s just a starting point. I want to use this blog and continuous sharing on Reddit as a way to remain accountable and make sure I actually continue to make progresses to eventually reach an end state.</p>
<p>As per my previous dashboard post, there are some goals I want to reach with this:</p>
<ul>
<li>As close as possible to full home control, including TV control (I may pick the most used devices to start)</li>
<li>Battery powered with USB-C recharge</li>
<li>Fully enclosed in a decently compact and nice looking 3D printed case</li>
<li>Custom buttons covers for easy to understand navigation</li>
<li>Could the result score high wife approval? This may be a stretch goal, but let’s try!</li>
</ul>
<p>So, what’s the initial update on Project Tako?</p>
<p>As I mentioned before, this wasn’t done completely from scratch today. I started tinkering with the idea some months ago, then life got in the way. Now, re-energised by the awesome internet community, I’m determined to bring it back to life.</p>
<p>The POC was left at this super barebone state – which I guess also serves as update #0:</p>
<ul>
<li>The project uses an <a href="https://amzn.to/3XCFDwx">ESP32 (affiliate link)</a> development board as its brain</li>
<li>A 1.77″ TFT display to show the UI (definitely not sure about this. May go e-ink as a further power saving excercise)</li>
<li>A bunch of standard buttons</li>
<li>Software wise it’s running on ESP Home</li>
</ul>
<p>The current state of the software is fairly limited, but it can do the following:</p>
<ul>
<li>Use the arrows to navigate up/down a list of predefined HA entities</li>
<li>Use the “enter” button to toggle each entity on/off</li>
<li>Use the yellow button to switch display to the “Apple TV” mode, in which ideally all buttons are re-mapped to control playback and navigation on the TV (this doesn’t work quite yet!)</li>
</ul>
<p>Now that I’ve made the project somewhat “official”, I’ll be determined to continue posting updates here and on Reddit, to share ideas and opinions with the amazing HA community at large.</p>
<p>Looking forward to the next update.</p>
<p>Happy tinkering!</p>
]]></content>
  </entry>
  
  <entry>
    <title>Building my dream watch – Mickey Mouse Rolex Dial</title>
    <link href="https://matteodallombra.net/2025/03/28/building-my-dream-watch-mickey-mouse-rolex-dial/"/>
    <id>https://matteodallombra.net/2025/03/28/building-my-dream-watch-mickey-mouse-rolex-dial/</id>
    <updated>2025-03-28T14:54:14.000Z</updated>
    <summary>Let’s continue the series of tinkering projects completed in the last couple of months, by switching to watchmaking instead of electronics. Watchmaking as well? Yep! I’ve always liked mechanical watches, from simple Flik Flaks to Rolex’s family heirlooms. They’ve all had their roles and importance over the years in my life. Most recently I’ve had …</summary>
    <content type="html"><![CDATA[<p>Let’s continue the series of tinkering projects completed in the last couple of months, by switching to watchmaking instead of electronics.</p>
<p>Watchmaking as well? Yep!</p>
<p>I’ve always liked mechanical watches, from simple <a href="https://www.flikflak.com/en-gb/">Flik Flaks</a> to Rolex’s family heirlooms. They’ve all had their roles and importance over the years in my life. Most recently I’ve had a small gap when my primary watch became an Apple Watch Ultra, but I guess at the back of my mind, there was always the bug of mechanical watches.</p>
<p>Not sure how, but I guess YouTube doing what YouTube does best, I came across <a href="https://www.google.com/url?sa=t&amp;source=web&amp;rct=j&amp;opi=89978449&amp;url=https://www.youtube.com/c/WristwatchRevival&amp;ved=2ahUKEwjzsq3WuKyMAxXaaEEAHdP8H7MQFnoECBEQAQ&amp;usg=AOvVaw2BO5_wniHWxXMVSYhHD4uC">Marshall’s Wrist Watch Revival channel</a>, finding it so relaxing and satisfying to see watches taken apart and brought back to new life! The algorithm then took it up a notch, by starting to serve videos of people actually building their own watches.</p>
<p>Two in particular really struck a chord with me – <a href="https://youtube.com/@marcuscreates?si=zpOJbdIox6tcT_5h">Marcus O’Brien</a> and <a href="https://youtube.com/@elliotcoll?si=cRuZvovs5mKW62Hu">Elliot Coll</a>. Both described themselves as watch enthusiasts, but neither is a “professional” and they both put out contents building their own “dream” watches, making it look doable.</p>
<p>So guess what? I took the plunge! To get things started I’ve actually followed the tutorial from Marcus, as I found it super easy to follow, plus he also listed all the basic parts needed to get started.</p>
<iframe loading="lazy" class="youtube-player" width="640" height="360" src="https://www.youtube.com/embed/EaOXeDo1y6A?version=3&amp;rel=1&amp;showsearch=0&amp;showinfo=1&amp;iv_load_policy=1&amp;fs=1&amp;hl=en-US&amp;autohide=2&amp;wmode=transparent" allowfullscreen="true" style="border:0;" sandbox="allow-scripts allow-same-origin allow-popups allow-presentation allow-popups-to-escape-sandbox"></iframe>
<p>The very first watch I built has already been taken apart and upgraded, but all in all, it was really super easy and accessible – and not really expensive as well.</p>
<p>But of course this was just the start of what has now become a full-fledged hobby, with friends and family requesting their own custom builds!</p>
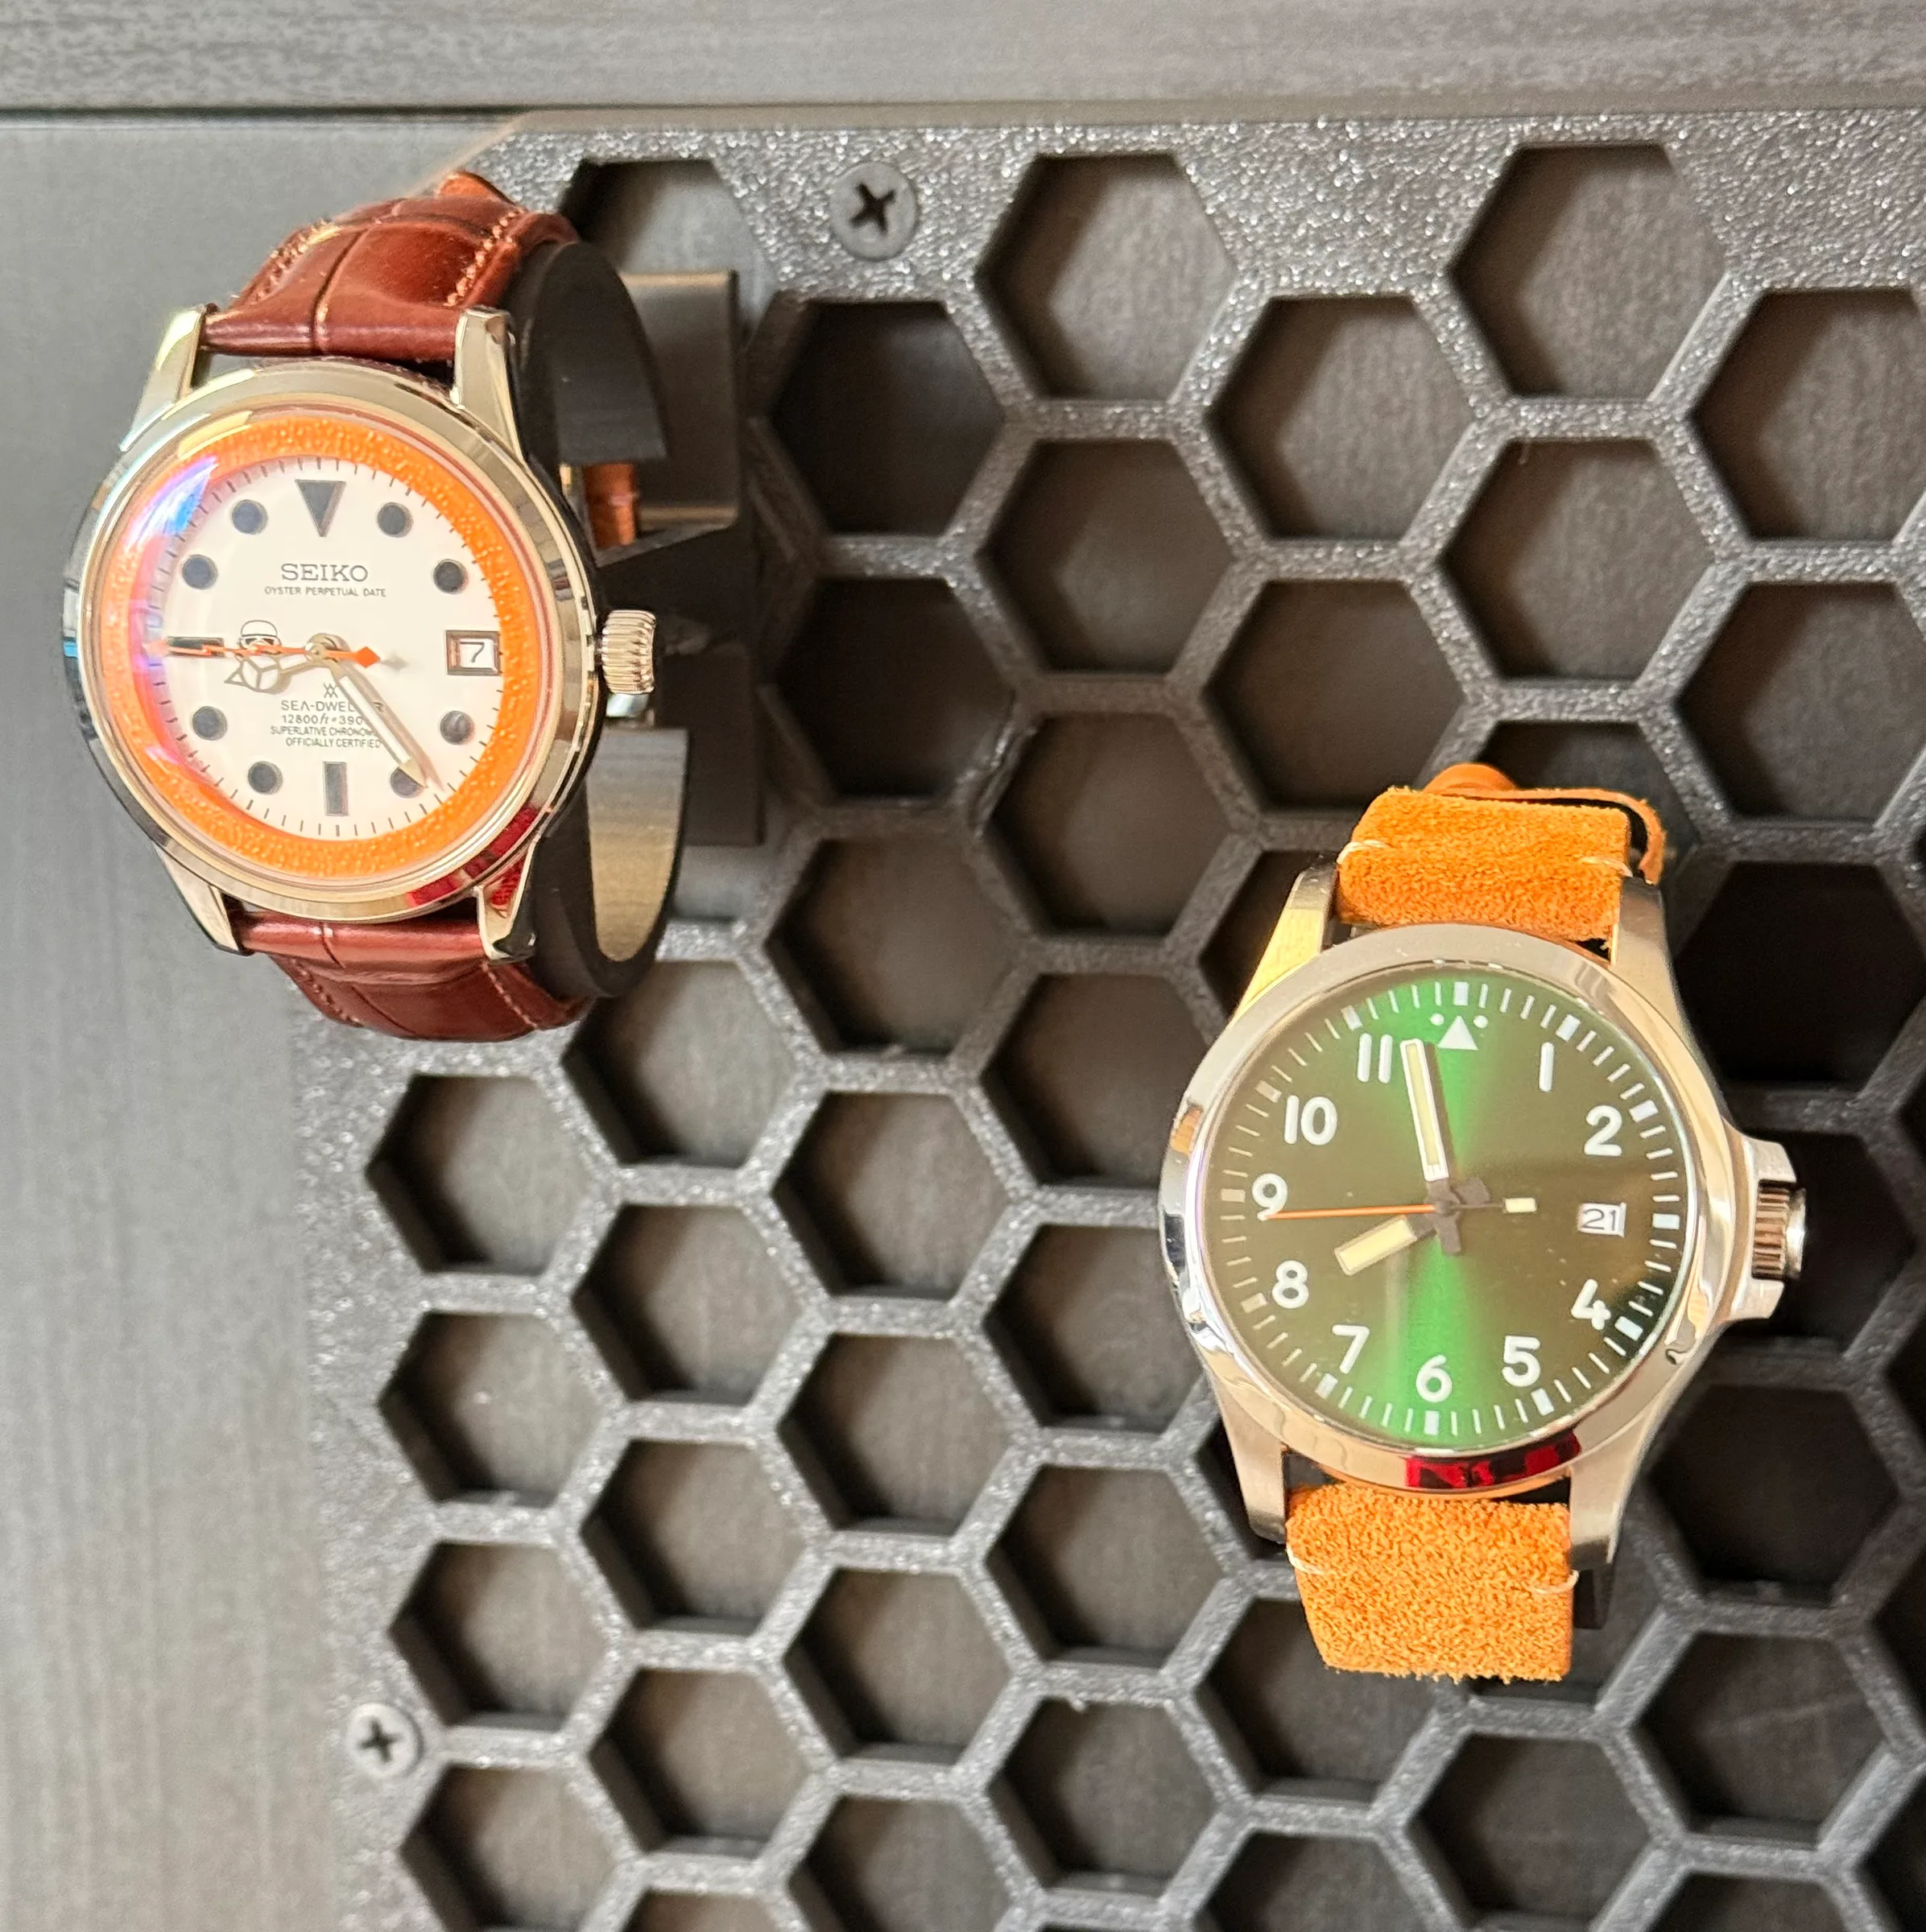
<p>My custom watch collection now consists of 3 watches, all based on <a href="https://calibercorner.com/seiko-caliber-nh35a/">NH35 movement</a>, but dressed in 3 very different ways. In the image below you can see two of them (the one on the left is actually my very first – with the upgraded parts and 3D printed inner rings).</p>
<p><img src="/assets/uploads/2025/03/IMG_1912.webp" alt="" loading="lazy" decoding="async"></p>
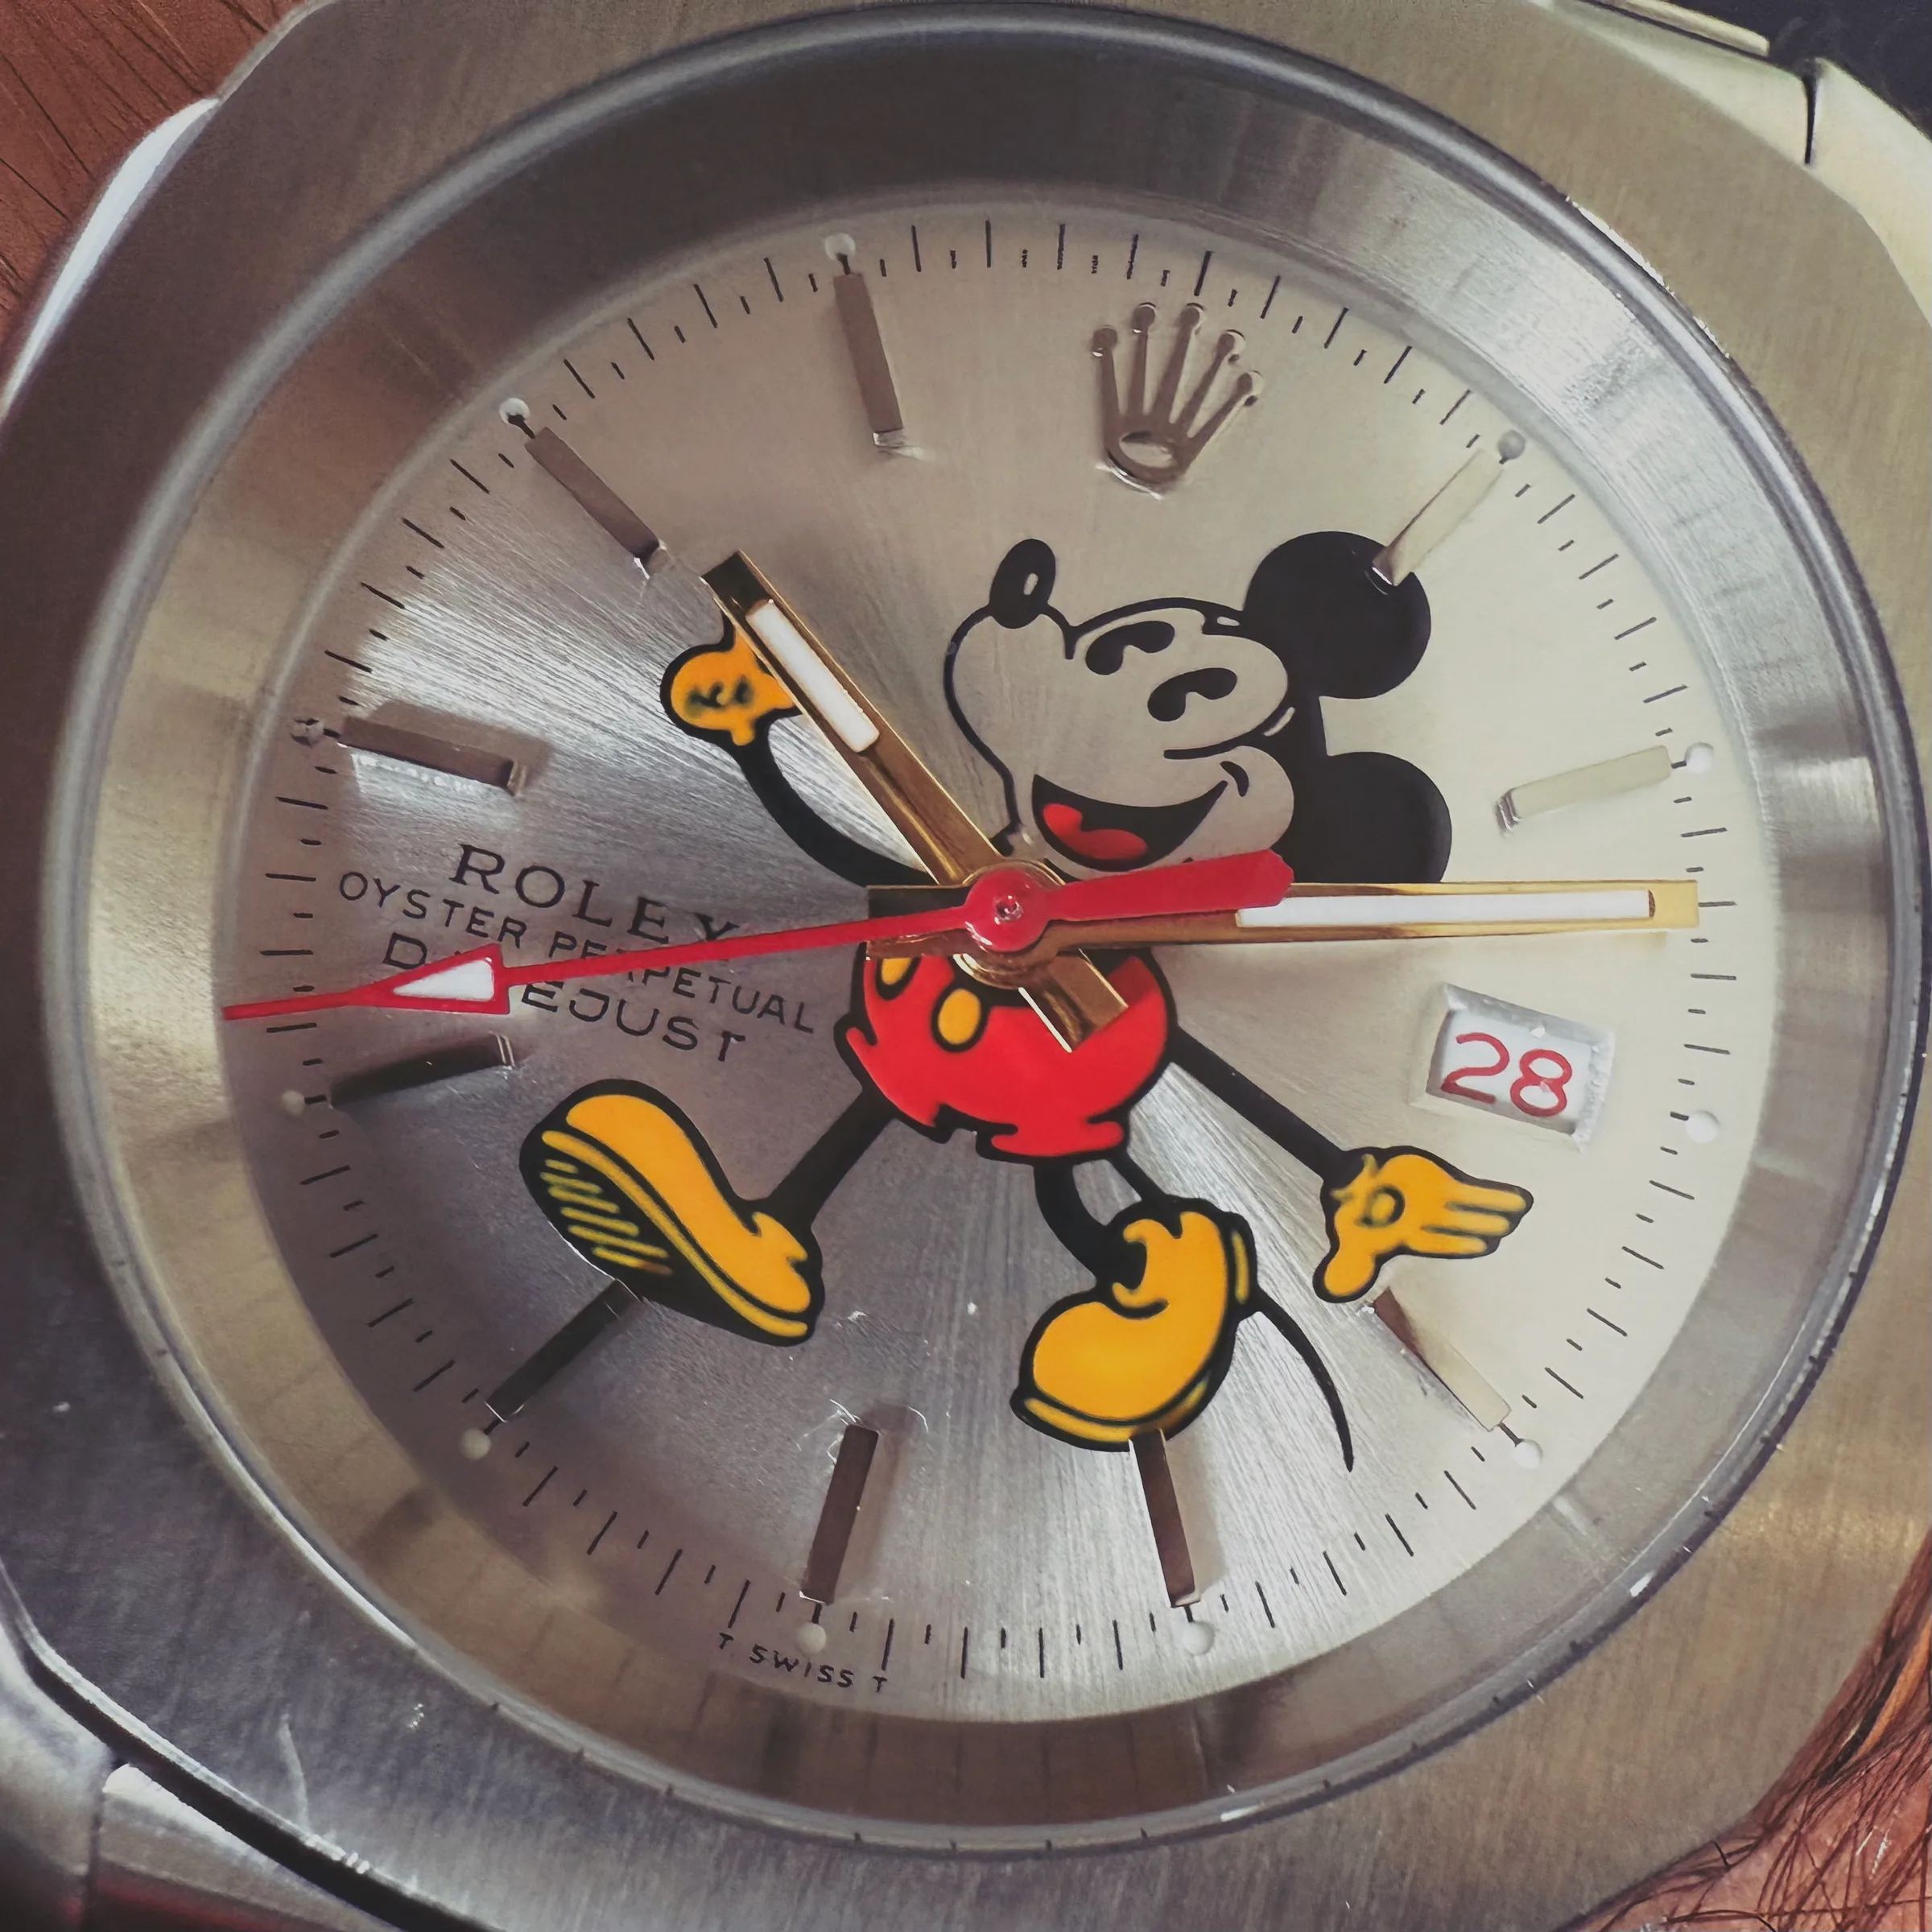
<p>But these are not the ones we are to talk about. We are here to talk about my “dream” build as per the title of this post: the Mickey Mouse Rolex Datejust.</p>
<p>This has been my most complicated build so far and I’m so proud of how it came out. I know it may be a controversial build for the purists out there, but I’ve embraced this hobby from the point of view of using it as an avenue for creativity even if that means upsetting the Watch Order out there!</p>
<p>Here it is in all its glory!</p>
<p><img src="/assets/uploads/2025/03/IMG_1901-scaled.webp" alt="" loading="lazy" decoding="async"></p>
<p>Let me walk you through all the parts used for this:</p>
<ul>
<li><a href="https://s.click.aliexpress.com/e/_oodNwXr">NH35 movement (affiliate)</a></li>
<li><a href="https://www.aliexpress.com/item/1005008136047041.html">Nautilus style case</a></li>
<li>Mickey Mouse Rolex Datejust dial (bought from eBay)</li>
<li><a href="https://s.click.aliexpress.com/e/_omytRxx">Dial dots (affiliate)</a> to attach the dial to the movement, given the dial feet were in the wrong position for the NH35</li>
<li>White Roulette Date Disc Wheel Overlay for Datejust – the date window of this dial of course doesn’t match the NH35 date wheel, so I’ve used this overlay and attached over the existing one of the movement and it works perfectly (from eBay – the specific one I bought is no longer available)</li>
<li><a href="https://amzn.to/4j6brSL">Golden Hours and Minutes hand (affiliate)</a></li>
<li>Red seconds hand (I can’t find the link anymore to this!!)</li>
</ul>
<p>The trickiest part of the build has been for sure aligning the date wheel overlay with the date window. Took a few tries, but result work great, everything moves as it should and I love the roulette scheme with the alternating red and black date.</p>
<p><img src="/assets/uploads/2025/03/IMG_0462.webp" alt="" loading="lazy" decoding="async"></p>
<p>The case as well feels great and it gives the right weight and importance to the build. I went with the Nautilus style not really because I didn’t want to “rip-off” an Oyster case, but simply because I liked the style and thought it was going to look more unique in the end, which is does!</p>
<p>The colour combination of gold and red for the hands was chosen to mimic Mickey’s colours of yellow hands and red pants and I’m also super proud of how that came out. Plus there is a bit more contrast with the silver dial and makes the watch easier to read.</p>
<p><img src="/assets/uploads/2025/03/IMG_1913.webp" alt="" loading="lazy" decoding="async"></p>
<p>I find myself many times during the day just staring at it, not to tell the time, but simply to enjoy the build and the result.</p>
<p>It will be a tough one to beat, but who knows when the next inspiration will struck??</p>
]]></content>
  </entry>
  
  <entry>
    <title>WallPi: Where the HA dashboard journey started!</title>
    <link href="https://matteodallombra.net/2025/03/27/wallpi-where-the-ha-dashboard-journey-started/"/>
    <id>https://matteodallombra.net/2025/03/27/wallpi-where-the-ha-dashboard-journey-started/</id>
    <updated>2025-03-27T18:39:25.000Z</updated>
    <summary>Yesterday I did a quick post detailing the design and assembly process behind my DeskPi. I was blown away by the response and interest in the project on Reddit, including the number of questions around my other surface mounted dashboard – which I affectively refer to as WallPi! I did tease this project briefly, so …</summary>
    <content type="html"><![CDATA[<p>Yesterday <a href="/2025/03/26/deskpi-my-take-on-a-desk-mounted-homeassistant-dashboard/">I did a quick post detailing the design and assembly process behind my DeskPi</a>. I was blown away by the response and <a href="https://www.reddit.com/r/homeassistant/comments/1jkieaf/deskpi_my_take_on_a_desk_mounted_ha_dashboard/">interest in the project on Reddit</a>, including the number of questions around my other surface mounted dashboard – which I affectively refer to as WallPi!</p>
<p>I did tease this project briefly, so it’s only fair I revisit the project now, to give some extra details on it.</p>
<p>I don’t have a lot of making-of pictures for this project (stupid me!), but I’ll do my best to walk you through the process and what’s required to achieve a similar result.</p>
<p>First, a bit of background – I actually started the journey of wall mounted HA dashboard by installing an old Samsung Tab A over an existing and un-used thermostat socket. I re-routed a long Micro USB cable through a wall nearby into my office to supply power.</p>
<p>It looked cool, but it was terrible. The tablet was super slow, it would freeze and would never give you any clear feedback if it had actually registered any inputs. No good!</p>
<p>Enter Raspberry Pi. I had a Pi4 not really massively used, installed in my home server rack, and I decided to try and use that as the brain for a new version of my wall mounted dashboard.</p>
<p>So I set off with these goals in mind:</p>
<ul>
<li>having a large clear touchsreen</li>
<li>move from USB power to PoE</li>
<li>add mood lights</li>
<li>make the final package looks nice on the wall to obtain high wife approval points!</li>
</ul>
<p>I should have probably done more research on Aliexpress, but for the display <a href="https://amzn.to/3QShdLS">I ultimately got this Waveshare 10″ touch display from Amazon (affiliate link)</a> (in the end the price difference wasn’t too bad at the time of purchase).</p>
<p><img src="/assets/uploads/2025/03/617MTmK2AUL._AC_SL1083_.webp" alt="" loading="lazy" decoding="async"></p>
<p>The previous tablet had a 7″ display and I knew I wanted to go a bit bigger, to fit more items on the main dashboard, eliminating the need for many sub-dashboards and make the final product a one-tap operation for the most parts.</p>
<p>The second step was the easiest: move away from USB power to PoE. <a href="https://thepihut.com/products/raspberry-pi-poe-plus-hat">I bought the official PoE+ HAT for my Pi4</a> and then routed an ethernet cable from the location of the display to a switch in my office.</p>
<p><img src="/assets/uploads/2025/03/raspberry-pi-poe-hat-raspberry-pi-sc0468-28628186235075_700x.webp" alt="" loading="lazy" decoding="async"></p>
<p>Sidenote: in full transparency, I started the project relying on WiFi for connection and USB for power. Turns out the the Waveshare screen is known for interfering with the antennas on the Pi when mounted on its back, which completely killed the connection. Ultimately I should have looked at PoE from the beginning as the final result is much more polished, but I guess this happy accident worked too!</p>
<p>Next was mood lights. In our house we have many lights, inside and out, that come on automatically at sunset and set the mood throughout the place. I wanted to integrate something here as well, given it’s located in the entry hall where there weren’t previously any night lights. The solution was to wrap a very basic and generic Zigbee LED strip around the inside of the casing, plugged in and powered directly by the Pi4. I don’t have a direct link for it, but literally any basic short LED strip will do the trick!</p>
<p>Now it was time for the most difficult part of the job: assembling it all together and mounting it on the wall in order to maximise wife approval!</p>
<p>This time I wasn’t savvy enough to scour for pre-made 3D models of the components, so I took many measurements with a calliper, to get to a point where I could design an enclosure.</p>
<p><img src="/assets/uploads/2025/03/IMG_0448.webp" alt="" loading="lazy" decoding="async"></p>
<p>As you can see, I’ve carved a bit off the back, to save on material and weight, and give some ventilation space. Plus, the main hole in the centre is overlapping the old thermostat mounting place, so it also gives me space to stuff the LED controller portion, keeping the full enclosure flush against the wall, hiding all cables from sight.</p>
<p>The raised lip inside is where I’ve routed the LED, keeping it a bit more inside to help with the overall effect of light diffusion. The large opening on the right side is where I’m feeding the Ethernet cable that eventually disappears inside the wall before going into my home office. The 4 screw holes are used to fix the case to the Pi/Screen assembly. The order is screen -&gt; pi -&gt; case. Using only 4 M3 screws it all comes together as one.</p>
<p>So how does it stay on the wall? Command strips! On the back of the case I’ve carved 4 recessed areas where you can place the Command Strips and make sure that overall the assembly stays as flush to the wall as possible.</p>
<p><img src="/assets/uploads/2025/03/IMG_0450.webp" alt="" loading="lazy" decoding="async"></p>
<p>A quick 3D printing with translucent PLA and that’s it! Job done and now I have a great looking wall mounted dashboard.</p>
<p><img src="/assets/uploads/2025/03/IMG_1896.webp" alt="" loading="lazy" decoding="async"></p>
<p>The final touches are done in HA to bring it all together. I have installed the <a href="https://github.com/j-a-n/lovelace-wallpanel">WallPanel addon via HACS</a>, using images stored on my NAS as the source. On top of this, I have <a href="https://github.com/thomasloven/hass-browser_mod">BrowserMod installed</a>, so that I can automatically interrupt the wallpaper if motion is detected by an <a href="https://amzn.to/4hN7Acl">Aqara motion detector (affiliate link)</a> semi-hidden on a shelf to the side.</p>
<p>Despite being a super custom model given the space where it’s installed, I’<a href="https://makerworld.com/en/models/1255368-wallpi-enclosure-for-wall-mounted-ha-dashboard#profileId-1278603">ve uploaded the model to MakerWorld</a> anyway!</p>
<p>Happy tinkering!</p>
<p>EDIT: on Reddit I’ve got some requests for the YAML code for the room summary cards. Below you can see an example for one row, which is then repeated four times to cover all the rooms I wanted to include (you will of course have to update the entity_id accordingly for your devices).</p>
<pre><code>type: horizontal-stack
cards:
  - type: custom:room-summary-card
    area: Master
    entity:
      entity_id: light.magic_switch_s1e_6cac_switch_1
      icon: mdi:ceiling-light
      tap_action:
        action: toggle
      hold_action:
        action: more-info
    entities:
      - climate.master_bedroom
      - entity_id: media_player.master_tv_3
        icon: mdi:television
      - entity_id: light.comodini_switch
        icon: mdi:globe-light
      - entity_id: light.koogeek_ls1_20481b_light_strip
        icon: mdi:led-strip-variant
    temperature_sensor: sensor.master_bedroom_temperature
    features:
      - hide_area_stats
  - type: custom:room-summary-card
    area: Guest Room
    entity:
      entity_id: light.led_desk_upstairs_light_strip
      icon: mdi:led-strip-variant
      tap_action:
        action: toggle
      hold_action:
        action: more-info
    entities:
      - climate.guest_bedroom
    temperature_sensor: sensor.guest_room_actual_temp
    features:
      - hide_area_stats
</code></pre>
]]></content>
  </entry>
  
</feed>